Quantcast
Channel: Printing with Gelli Arts®
Viewing all 344 articles
Browse latest View live

Gelli™ Printing: Artist Trading Blocks...with Giveaway!

$
0
0
If you have stacks of Gelli™ prints and are looking for some fun ways to use them... how about making some Artist Trading Blocks! If you like to create small collagesArtist Trading Blocks (ATB's) are a perfect substrate! Each block gives you SIX small surfaces to cover!


There are no rules, so any block will do. Many artists choose to make a block, or cube, from chipboard or matboard. Templates for making boxes are easy to find. Or you can construct a cube from book board to the size you want. But I especially love wood blocks, so that's what I used.


Luckily, I had a renovation project going on and my contractor was kind enough to cut up a 4x4 post and supply me with a bunch of 3-1/2" square wood blocks.

I sanded them and filled the rough surfaces and imperfections with molding paste. When they were dry, I sanded them again and gave each surface a coat of gesso. These blocks are heavy and have a nice solid look and feel.


Here's how to create the collages:
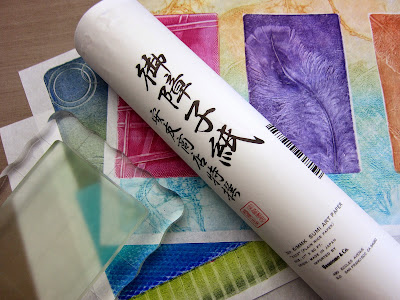
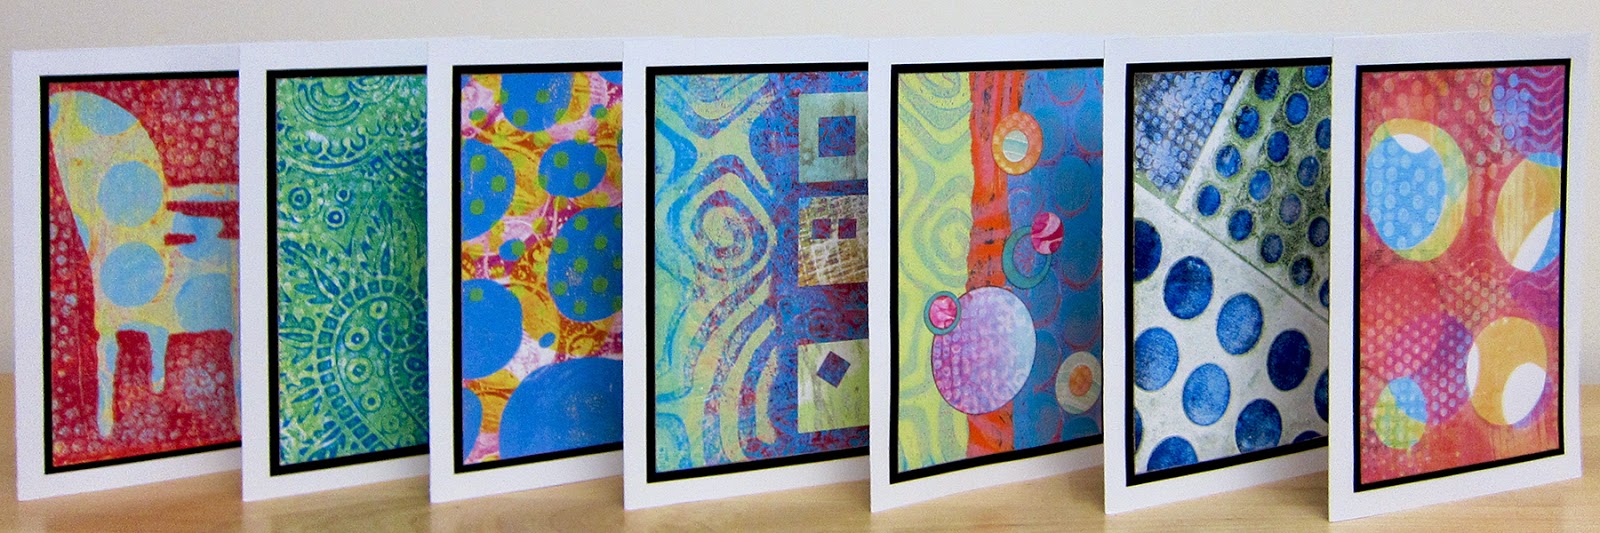
  1. Cut six squares of heavy paper stock or bristol, each slightly larger than the block's surfaces. I used Strathmore Bristol(Smooth)it's a great collage substrate.
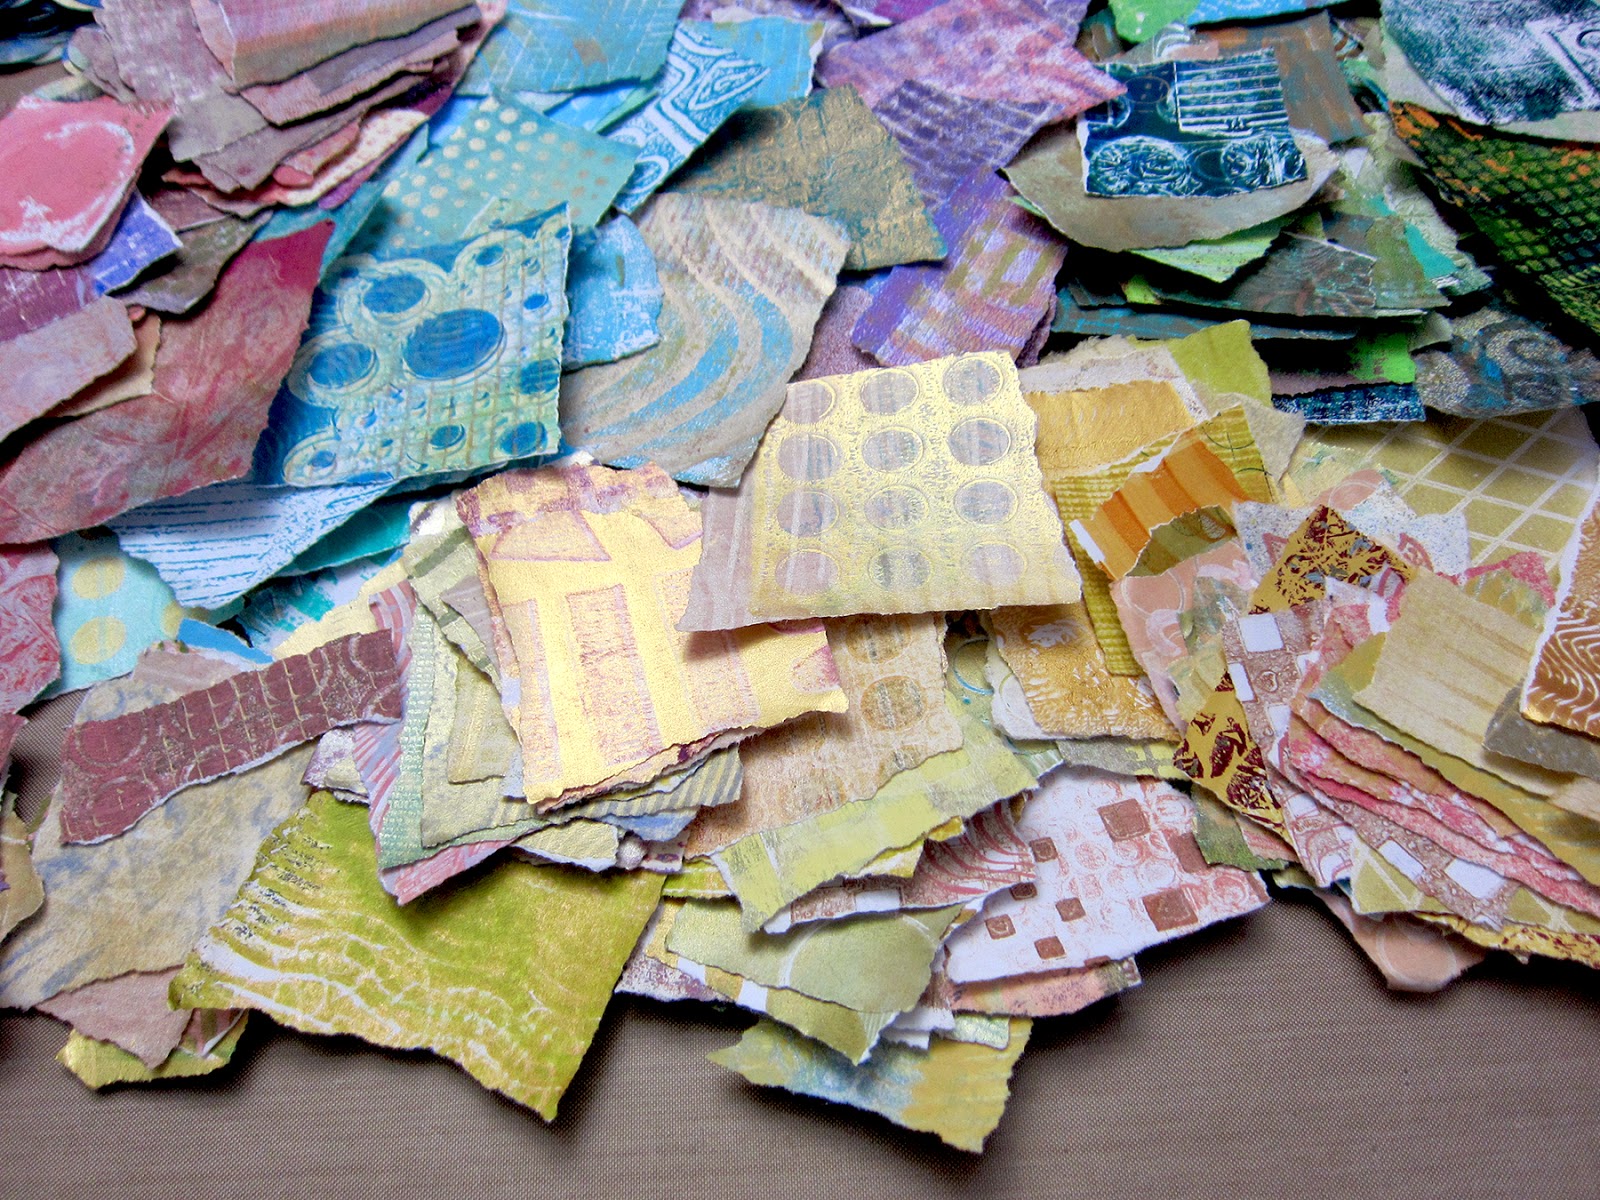
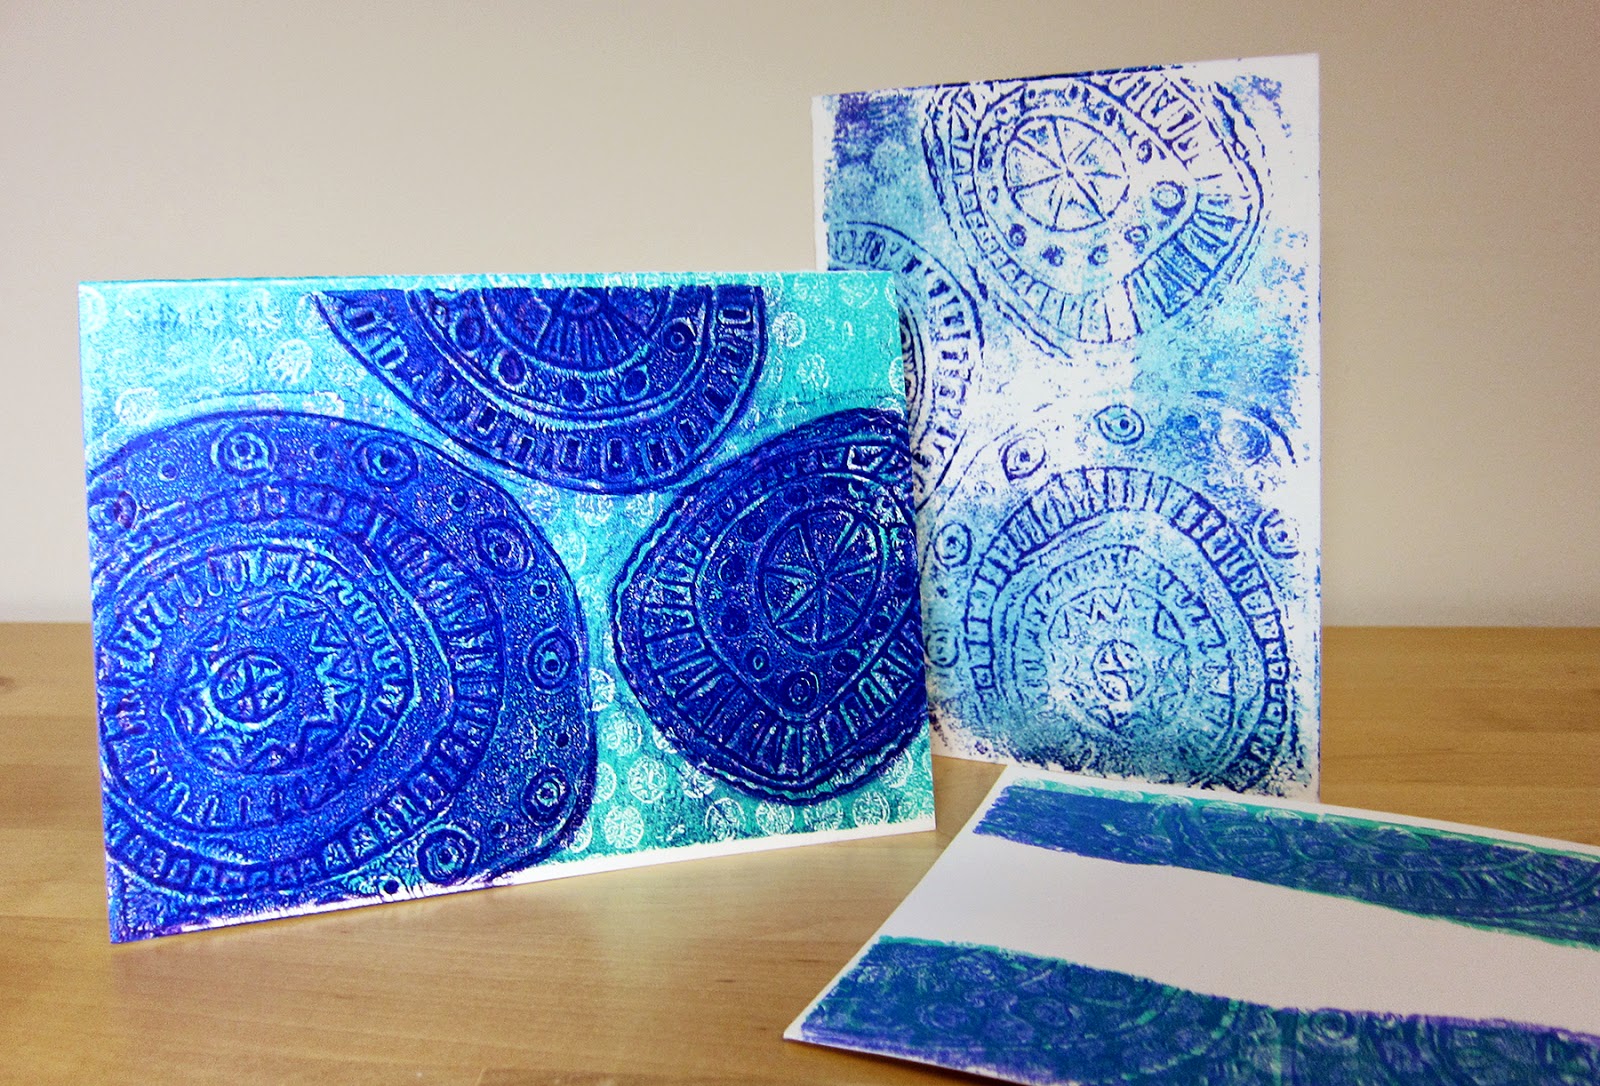
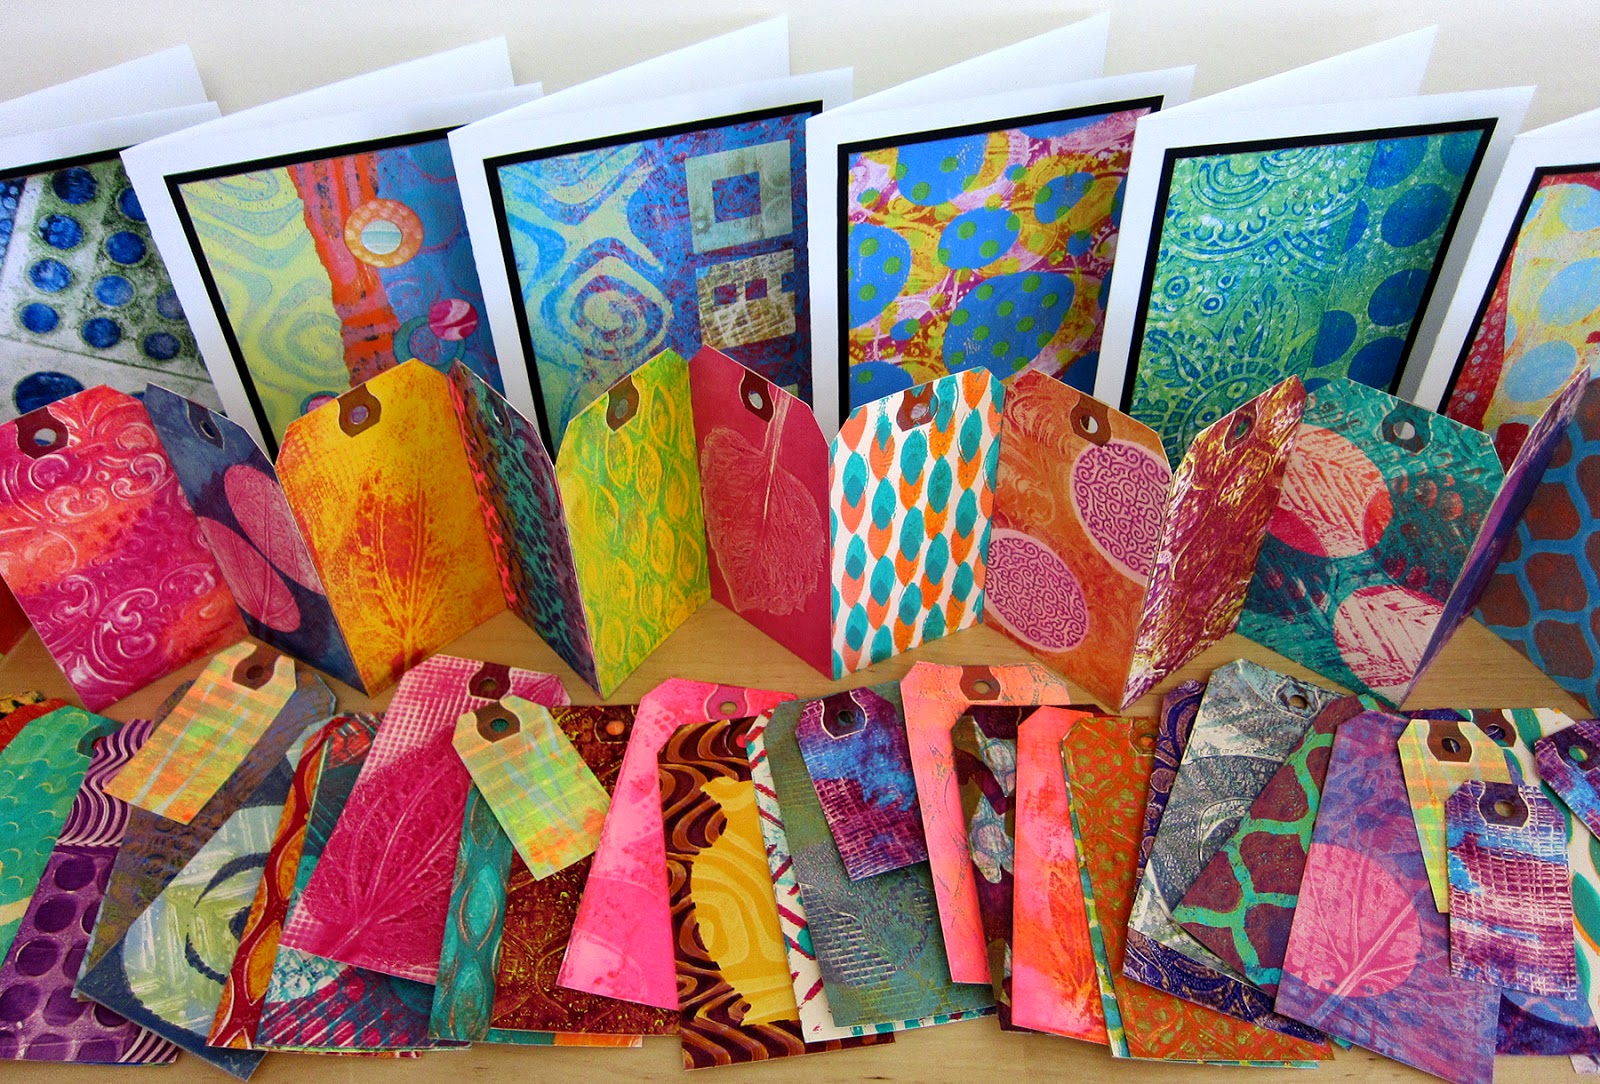
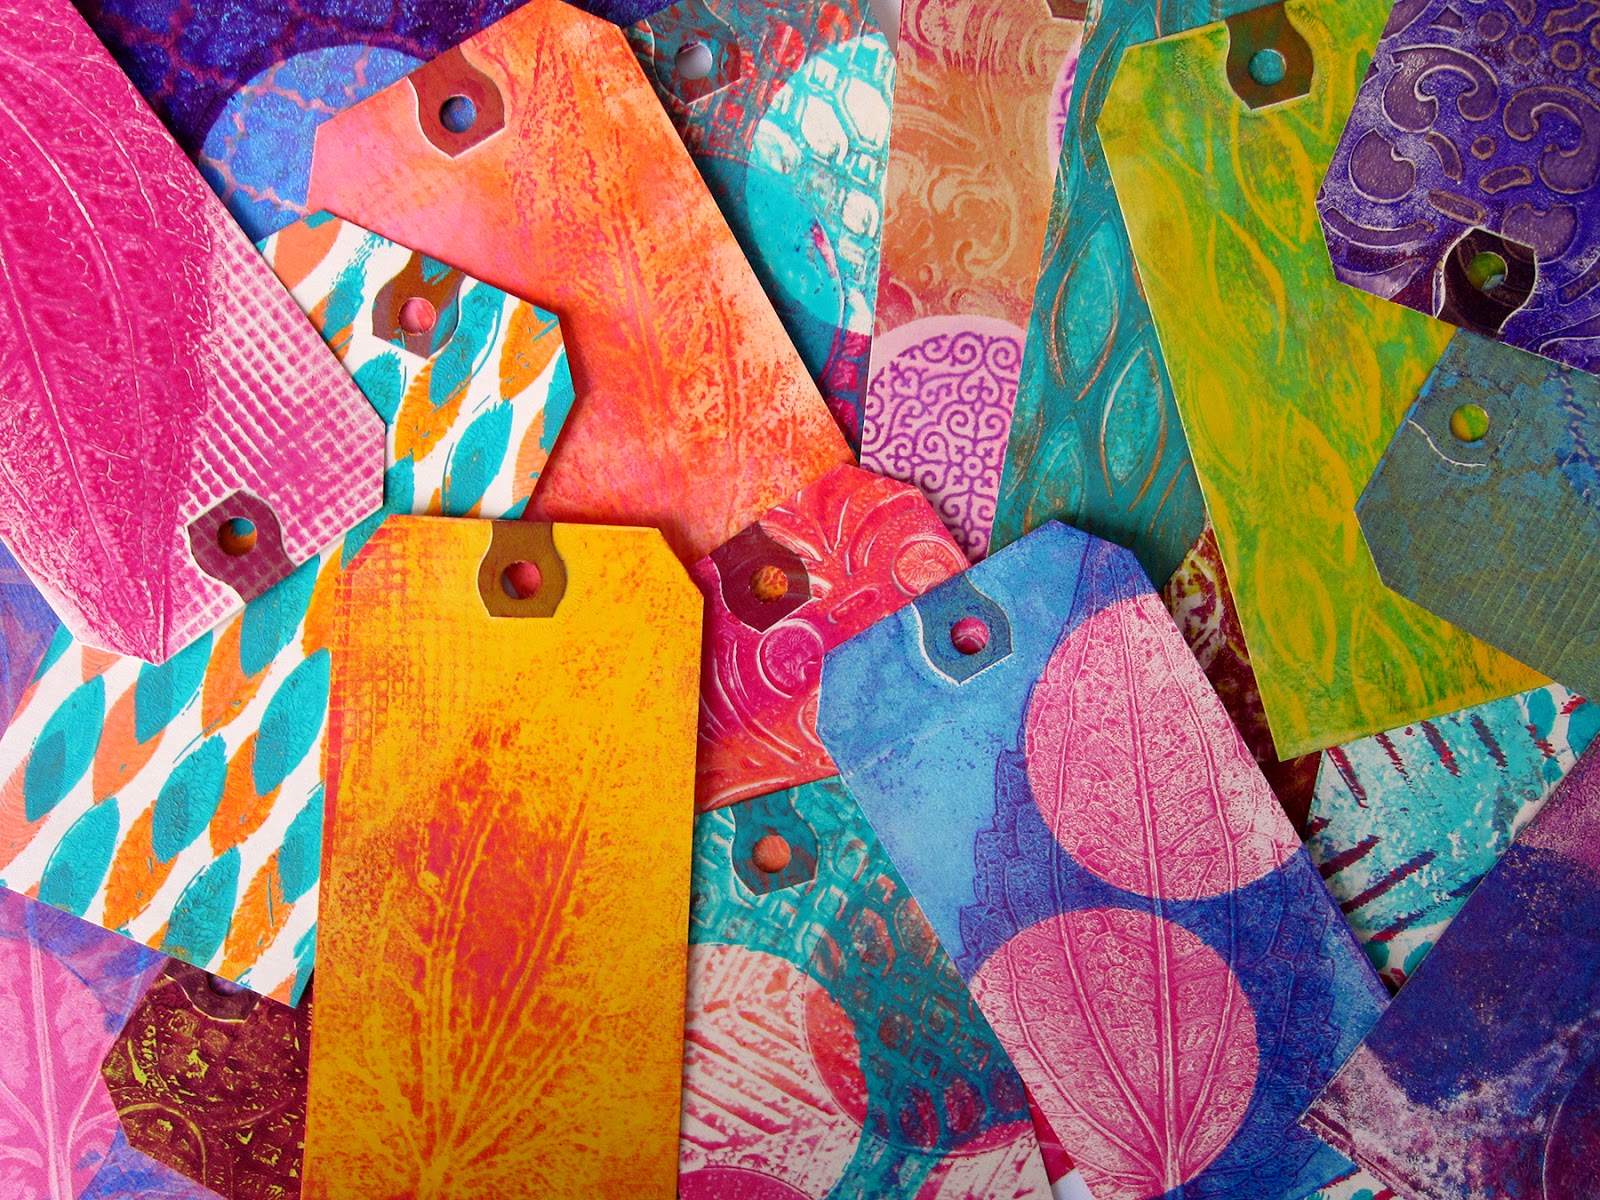
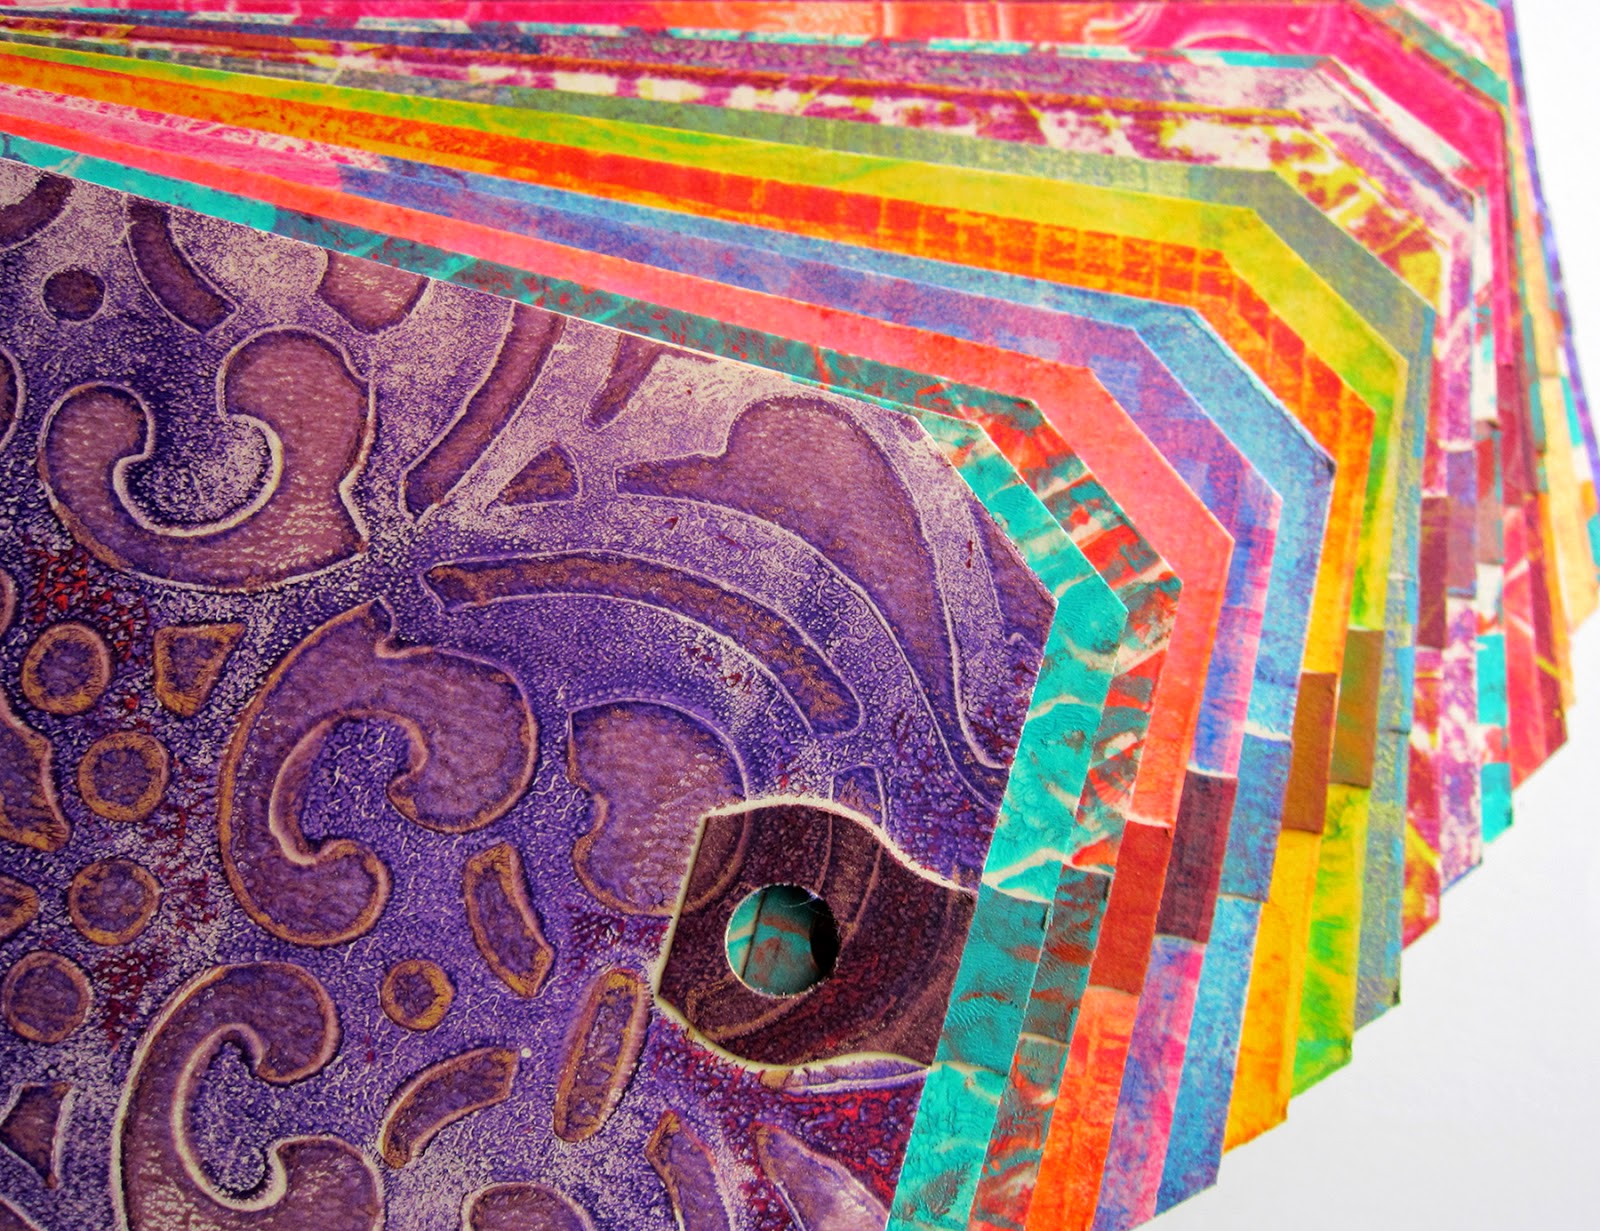
  2. Select Gelli prints to create backgrounds for the collages. Tear or cut printed pieces, then arrange and glue to the bristol.
  3. Glue a collage background to a side of the block. Place the block on a cutting mat and carefully trim the paper against the edges of the wood block with a craft knife. Do this for each side.
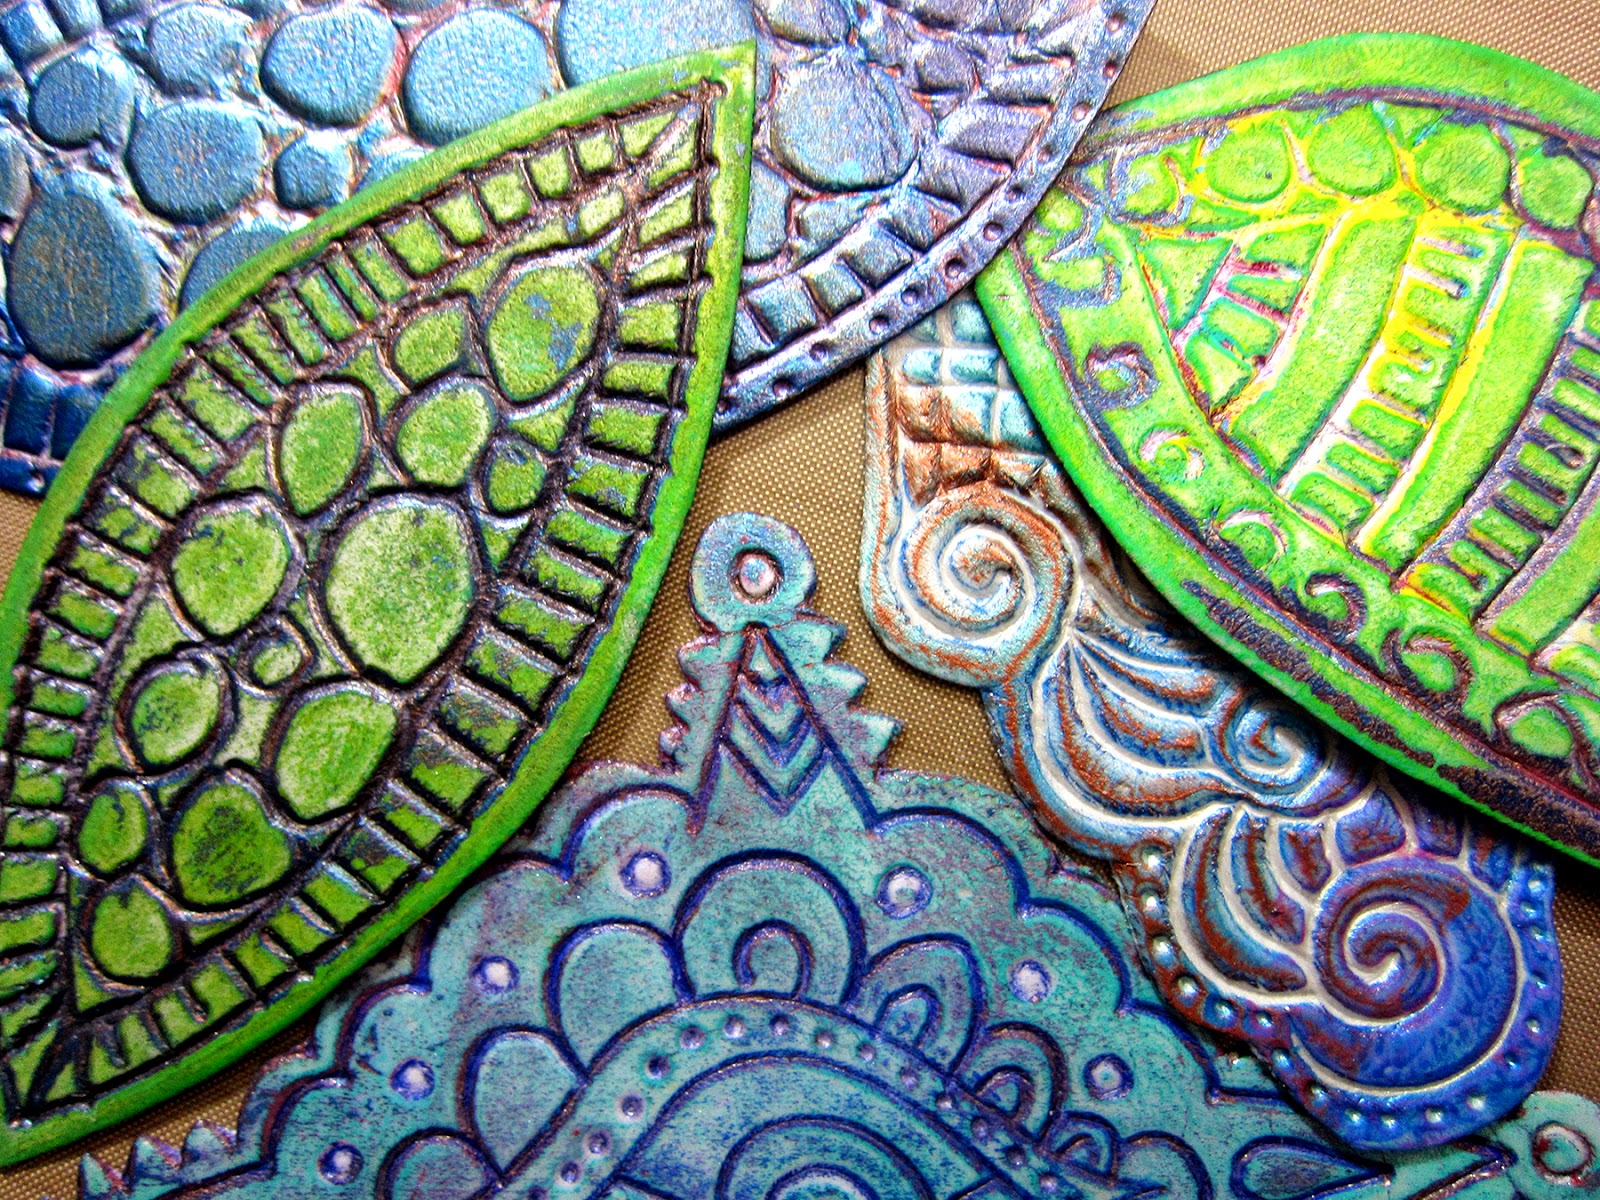
  4. Build a collage image on each backgroundand glue the pieces in place.
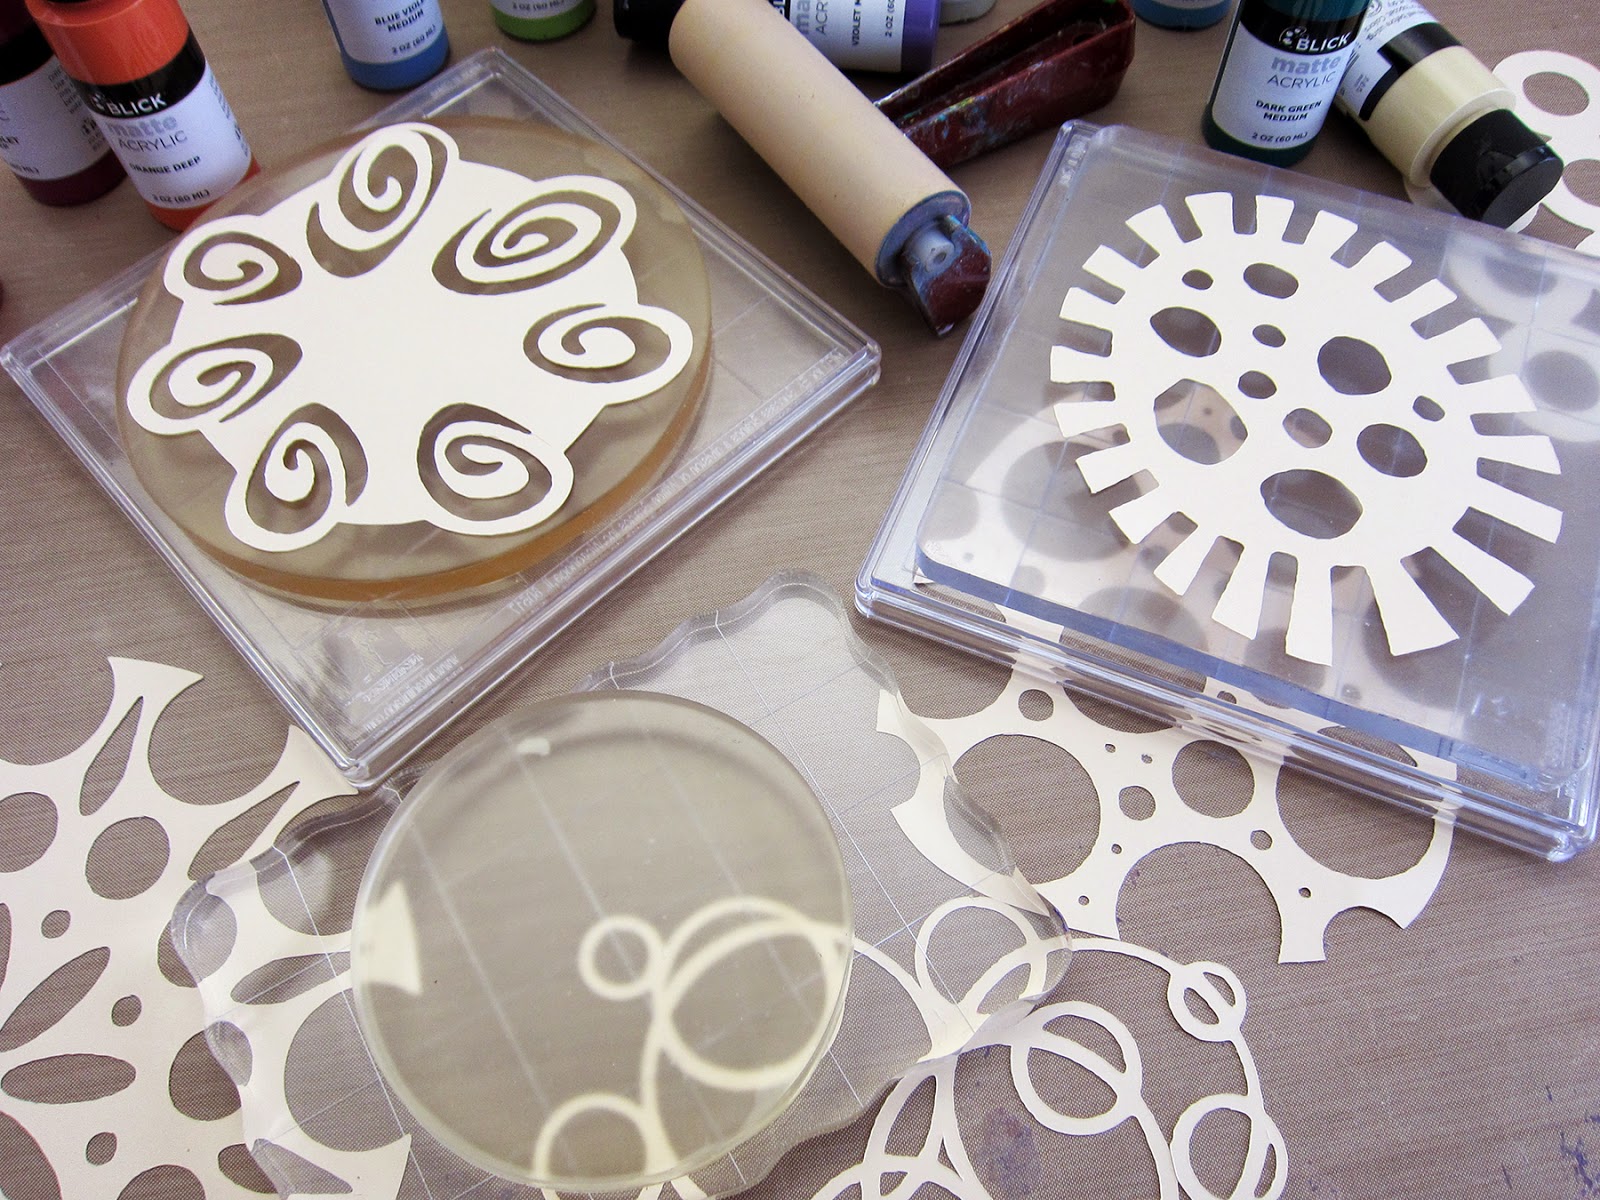
  5. If desired, add details with colored pencils, metallic paint pens, rubber stamps, and your favorite embellishing techniques.
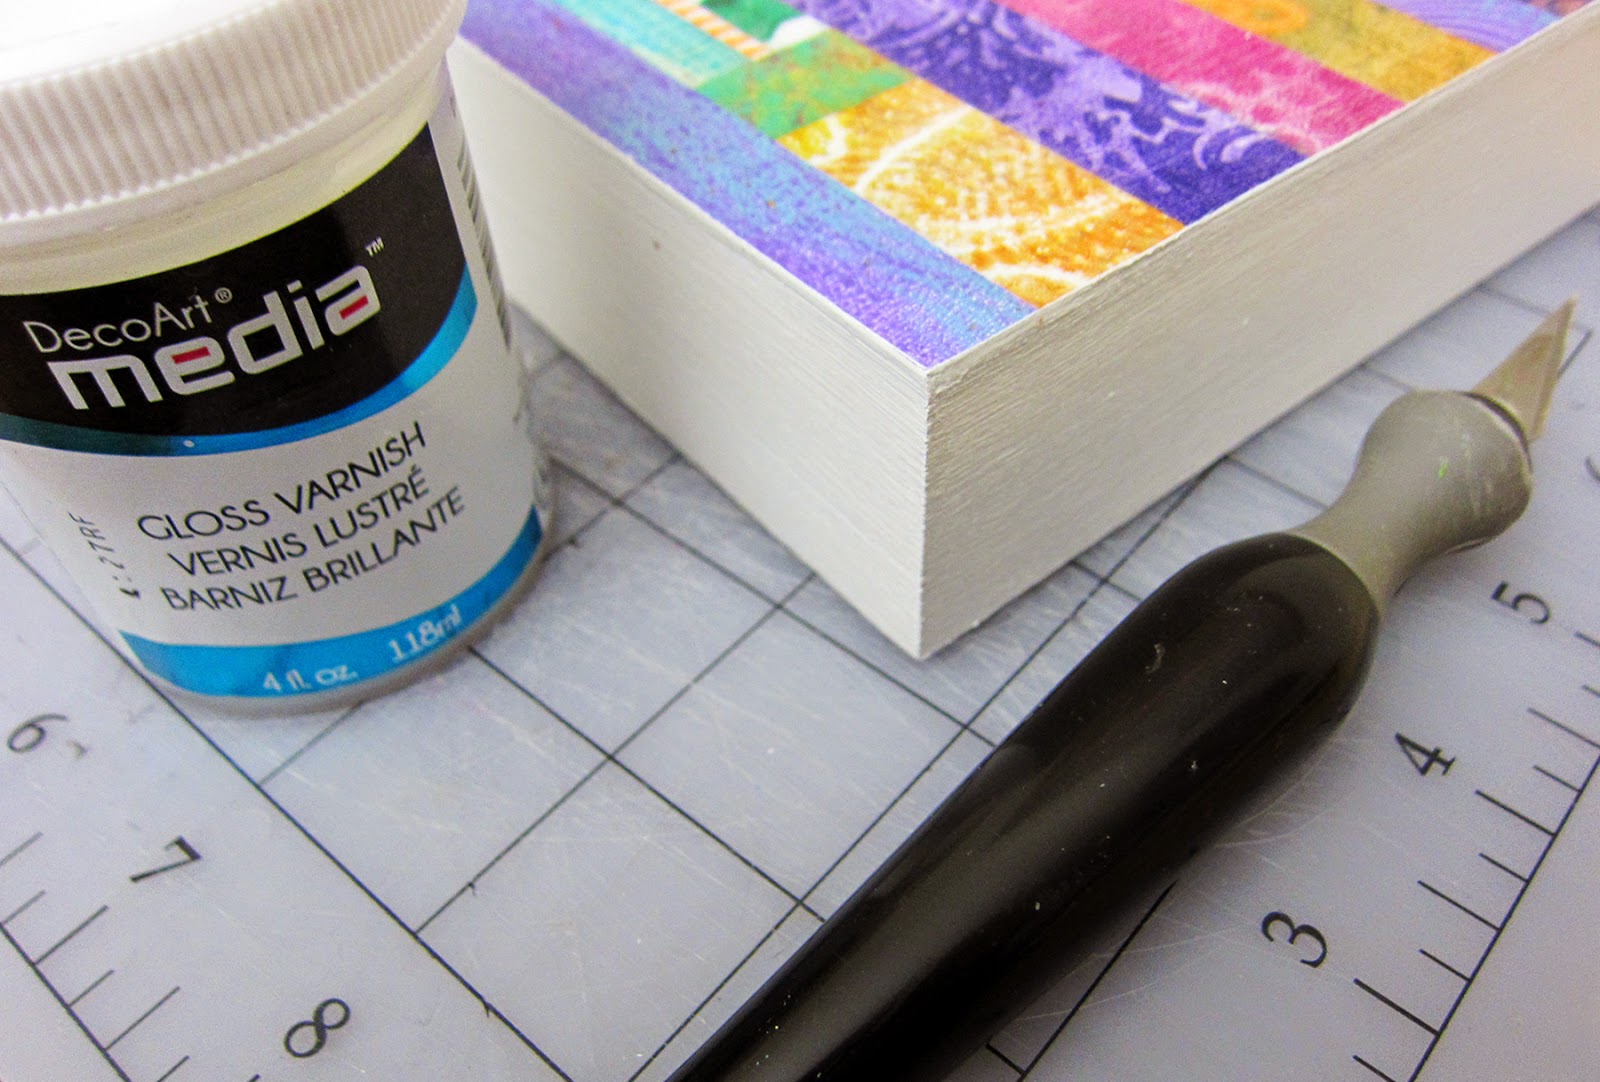
  6. Color the edges with permanent ink or paint. (I swiped the edges with a StazOn ink padSaddle Brown.)
  7. When the piece is complete, you may want to varnish it. The smooth block begs to be handled!


I found my theme for this ATB when I came across a circle I had punched out from an old book titled, Substance of a Dream. So my plan was to create a dreamscape collage on each side of the block, each including a sphere or circle image. It's a bit like the process for creating content for an artists' bookthe six sides lend themselves to presenting a narrative or taking a thematic approach.
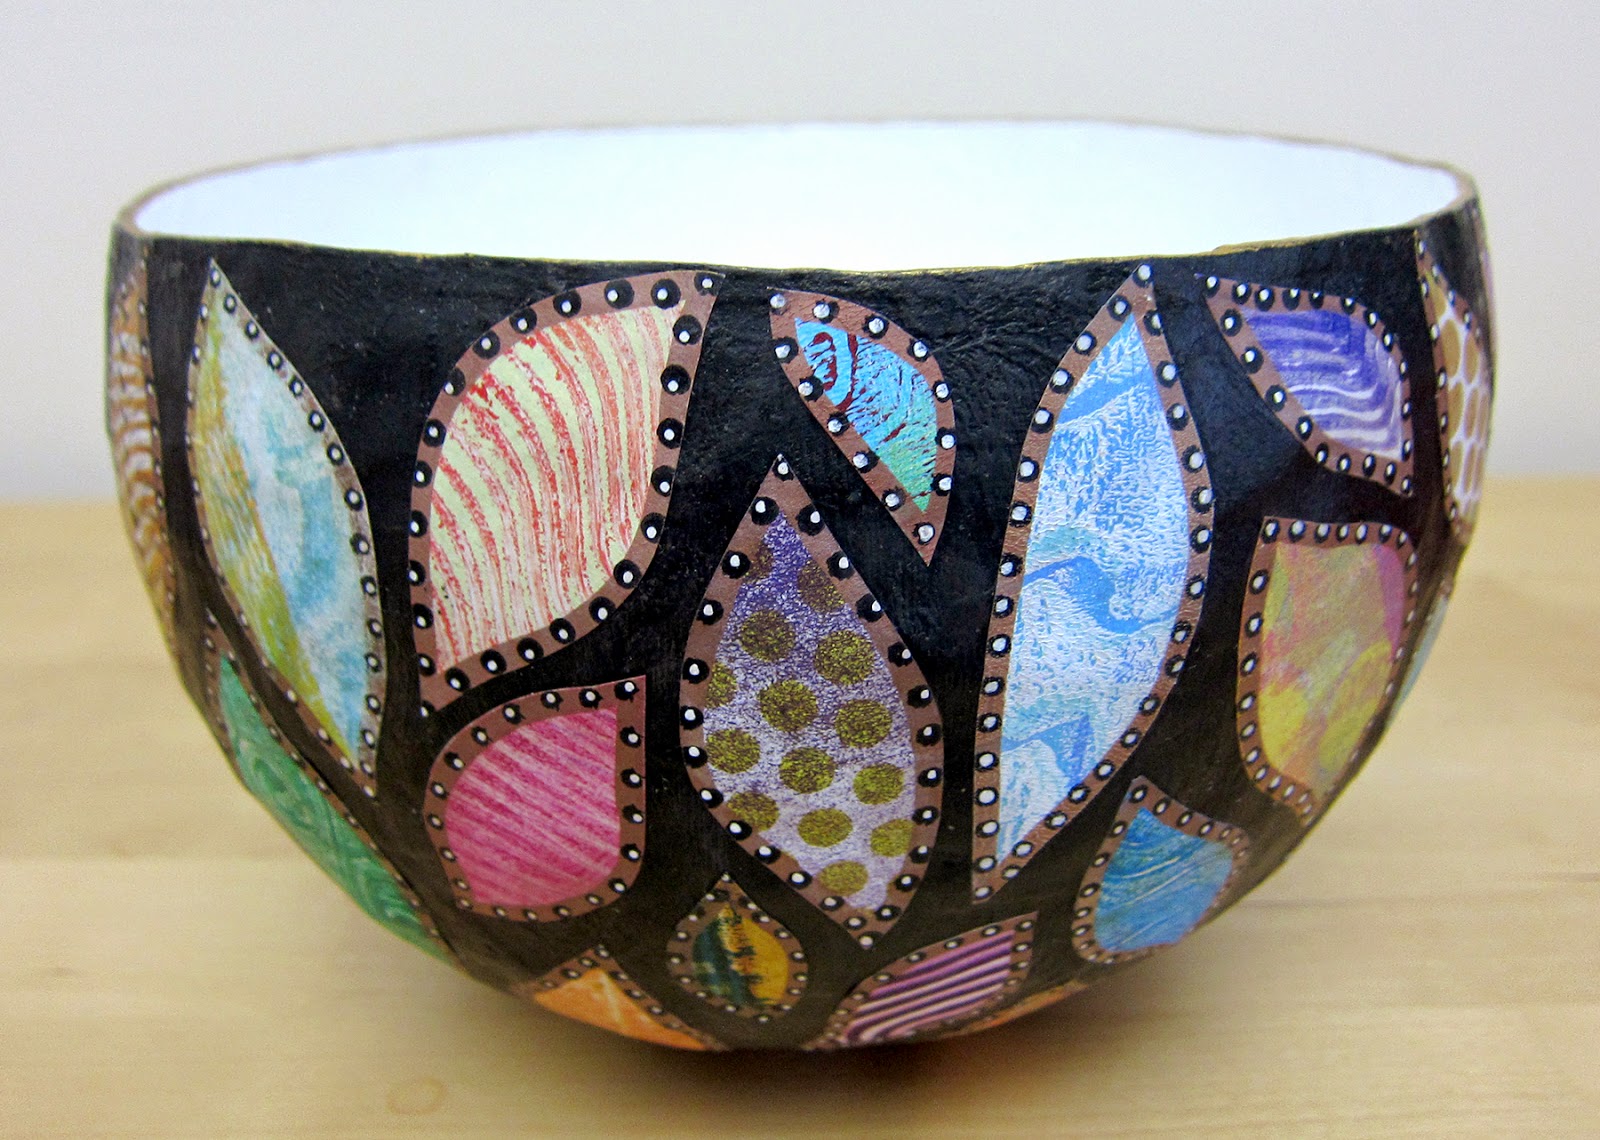
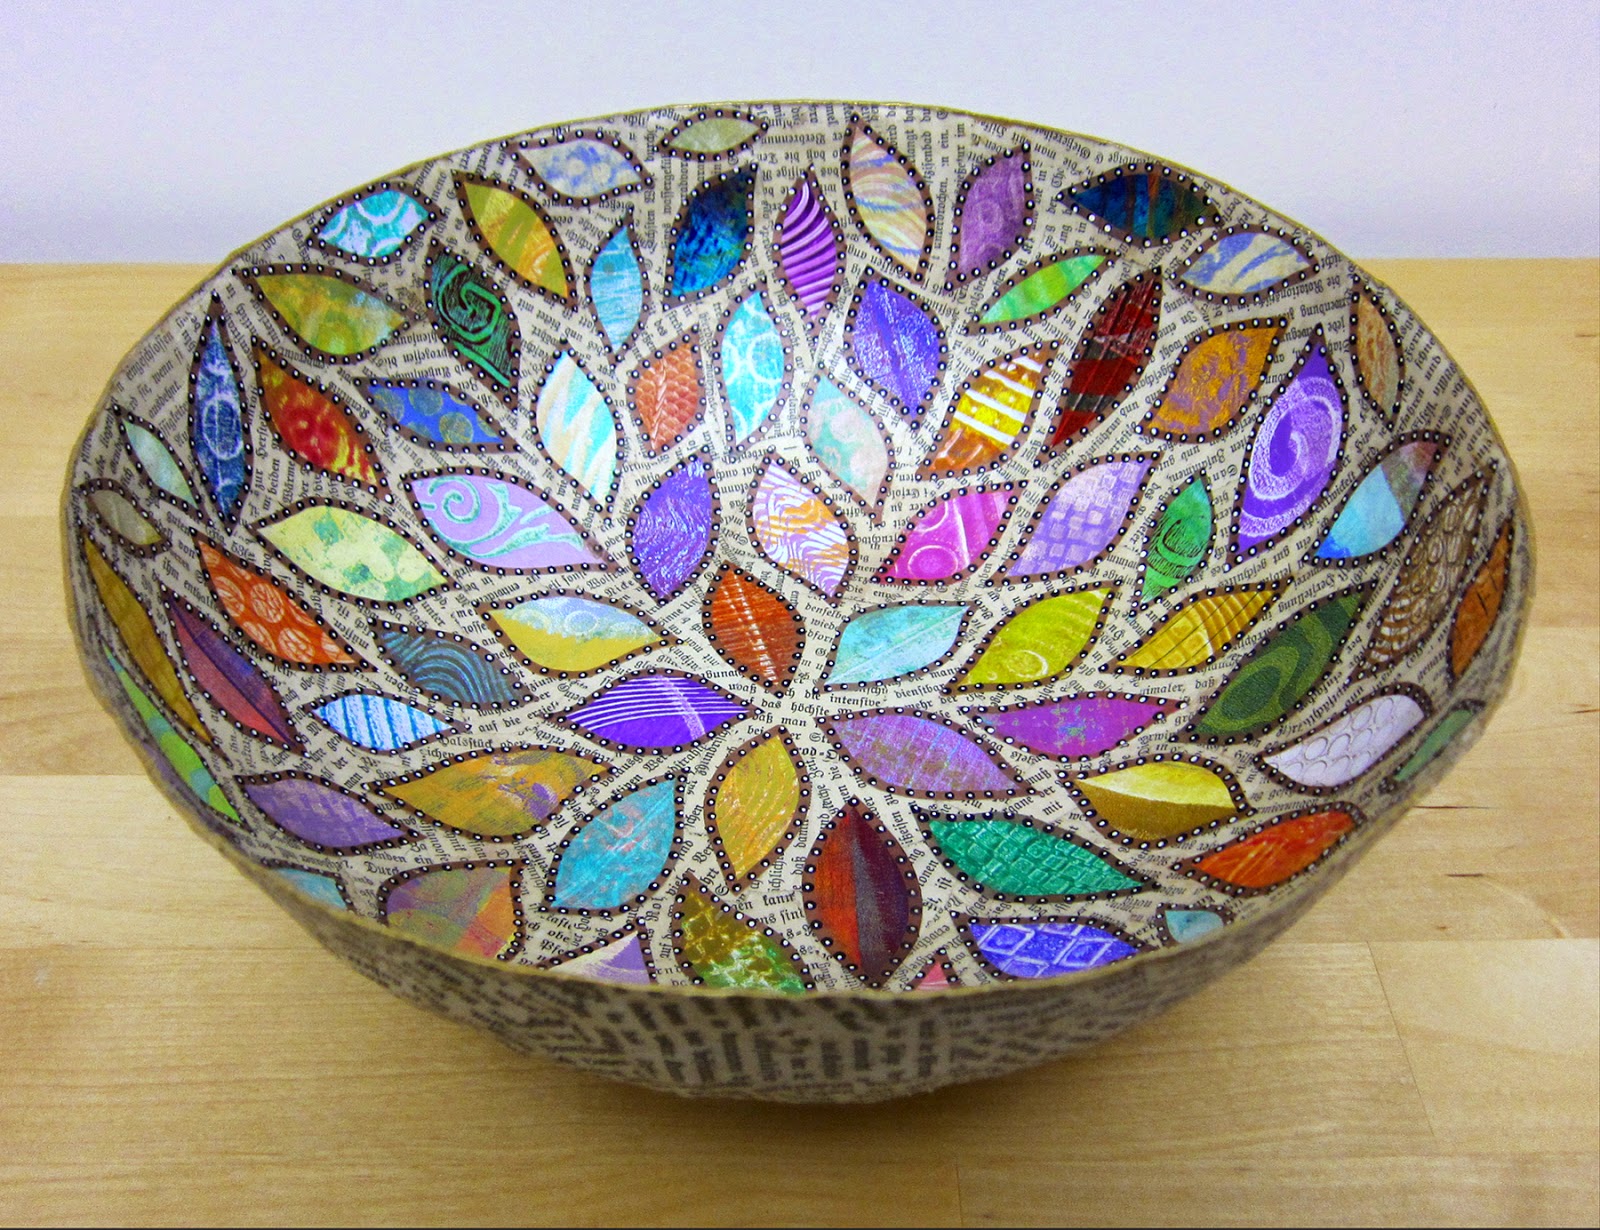


ATB's don't have to follow a themethey look fabulous as decorative blocks, covered with some of your favorite Gelli prints! Make a bunch! Mix up the sizes! Cover assorted small wood blocks from the craft store! It's addicting!

NOTE:  I used several coats of DecoArt Satin Varnish on this block and loved the way it intensified the colors. However, it was a bit too shiny to photograph without glare, so I added a final coat of DecoArt Ultra Matte Varnish to eliminate the shine. The block ended up with a lovely matte finish and the artwork is completely sealed and protected.


Wood blocks are perfect for further altering, like hammering embellishments into them. Lots of ATB's are covered in dimensional embellishments. Many are built up with pieces added on, such as feet, finials and all sorts of found objects. Some are constructed into a stack of multi-sized blocks, which can be glued together... or not. So many possibilities!


This Contest is officially CLOSED


And for a fun and different giveaway... I'm offering my Artist Trading Block, 'Substance of a Dream'—shown in this blog!

To enter the giveaway, click on the red 'ENTER GIVEAWAY HERE' button below! (This will ensure that we can contact the winner and that entries are limited to one per person. One winner will be selected from all the entries via a random number generator to win this fun giveaway!)


Entries will be accepted until Friday, Nov. 7th at 12 pm EST. Our lucky winner will be contacted by email and announced here on the blog and on our Facebook page no later than Friday, Nov. 7th at 5 pm EST!

This Contest is officially CLOSED


Please leave a comment below and share your thoughts! We love hearing your feedback!

Good Luck and Happy Printing!

Gelli™ Printing on Fabric: Fun with Stencils & Pencils...with Giveaway!

$
0
0
Monoprinting is a great way to create unique designs on fabric! Watch this Gelli videofor fun ideas using stencils and pencils for fabric surface design! 


Using commercial stencils to monoprint on fabric is a great way to get started. And after you've created your print...you can keep going to add to your design with colored pencils! 


In the video, the demonstration is on 100% cotton. The paint is SoSoft by DecoArt, which is a fabric paint that barely changes the hand of the fabric. It's easy to work with and doesn't need to be heat-set! The pencils are Inktense by Derwent, and they are perfect for use on fabric. Inktense pencils are water-soluble, but permanent after they dry — and you can layer over the dry ink. 


When printing on fabric, I first iron each piece onto freezer paper to stabilize it. Doing this simple step makes handling fabric as easy as printing on paper. It also keeps the process clean, as any paint that may bleed through the fabric won't get on your hands. Another benefit is that it's easier to apply colored pencil to fabric that is stabilized. 


TIP: When ironing fabric onto freezer paper, place the freezer paper shiny side UP on your 
ironing surface. Place your fabric on the freezer paper and cover with parchment paper to 
protect your iron. 

Ironing will create a temporary bond and stabilizes the fabric for easy handling while printing and embellishing with pencils. When the print is finished, gently pull the fabric off the freezer paper. 


Here's how to create this print: 

  1. Apply paint to the Gelli plate and roll into a smooth layer with a brayer. When printing on fabric, use a heavier layer of paint than when printing on paper. 
  2. Place a stencil on the painted plate. Apply a second color of paint to the plate and roll out over the stencil. 
  3. Remove the stencil. Lay your fabric on the plate, rub to transfer the paint and pull your print. This is the first printed layer.
  4. Roll a layer of paint on the plate. Place a different stencil on the painted plate. (A stencil with larger openings works best for this layer)
  5. With the stencil in place, print onto paper to remove the paint in the stencil hole areas. You may need to print this on paper more than once to remove all the paint from the stencil hole areas.
  6. Remove the stencil, place your printed fabric on the plate to print the paint that was under the stencil. Rub to transfer the paint and pull the print. This is the second printed layer on your fabric.


Brush a thin layer of Transparent Medium or water on an area of the fabric before coloring with Inktense pencils. Doing this will make the application smoother and intensify the colors. You can also brush dry pencil marks with medium to blend pencil colors on the print. Or, you can dip the pencil tip in the transparent medium. You can use water to thin the medium, if desired. 


Another option instead of using transparent medium is to use just water. The color will be very intense, and more difficult to control. Using water will probably cause the pencil color to bleed on the fabric. You may want the watercolor wash effect! Using the medium keeps the color from bleeding. Some fiber artists use Aloe Vera gel, which, like transparent medium, helps to control the application of Inktense color and keep it from bleeding.


If you like to draw or doodle on your prints, try it on fabric! The process is so much fun and can add your individuality to stenciled images! 


For more information, techniques and ideas for printing on fabric, please take a look at the 
earlier blog post and video: Gelli Printing — Techniques on Fabric! from September 19, 2013. 


And now for our FABULOUS GIVEAWAY!!! 


Our amazing Prize Package includes: 


To enter the giveaway, click on the red "ENTER GIVEAWAY HERE" button below! (This will 
ensure that we can contact the winner and that entries are limited to one per person. One 
winner will be selected from all the entries via a random number generator to receive this very special giveaway!) Entries will be accepted until Monday, Nov. 24th at 12 pm EST. Our lucky winner will be contacted by email and announced here on the blog and on our Facebook page no later than Nov. 24th at 5 pm EST

Special thanks to our friends at DecoArt for generously providing the paints in this giveaway! 

Good Luck and Happy Printing! 

Gelli™ Printing On-the-Go!

$
0
0
For those of you taking art supplies with you on-the-go, the small Gelliplates are essentials to pack in your art bag! Monoprinting beyond the studio has never been easier! Watch this video to see some fun portable printing supplies in action!


The list of 'must-have' supplies to pack in your travel bag are pretty individual. I'll show you what I pack in my travel art bag. Okay, maybe 'cram' is a more accurate word! But as you'll see, this bag provides for more than just monoprinting. Supplies for art journaling, collage, card making, stamping, doodling, and watercoloring are all includedfor fun ways to work with Gelli prints!


The bag is the Voyager 15" Canvas Rigger Bag from Harbor Freight. This sturdy bag has a spacious interior and convenient pockets on the outside, so it holds a load of stuff! The strong handles make it manageable to carryeven when you load it up!


The bag is a blank canvas just waiting for your creative decorative inspiration! So have at it and make it your own!!


Here's how to decorate a bag like this one:

1.     Cut pieces of black felt to cover each of the outside pockets (only for the shorter pocketsthere are two levels of pockets).
2.     Cut a piece of Gelli-printed fabric slightly smaller than each piece of black felt.
3.     Fuse each printed fabric piece to a piece of felt with fusible webbing, like Wonder-Under.
4.     If desired, work further on the printed fabric with colored pencils, fabric pens and paint markers.
5.     Apply red-liner sticky tape to the back of each felt piece. Remove the red liner and press each felt/fabric piece firmly into place on the canvas bag. If you prefer, the pieces can be glued in place with an adhesive, like tacky glue.
6.   If desired, you can paint the blank canvas bag before adhering the felt/fabric pieces.


Here's what's packed in the bag!!!

Gelli Plates The 3"x5" and 5"x7" fit easily into a travel art bag!


Acrylic paint DecoArt Media Acrylics are convenient to pack a little paint goes a long way!


Paper Strathmore has fabulous papers just right for a variety of On-The-Go printing!


Brayer — it's a 4" Speedball Soft Rubber Pop-In Brayer for my travel art bag!


For mounting the Gelli plates to use as stampsan Inkadinkadoo Clear Extra Large Block works well for the 3"x5" plate. And the 5"x7" Gelli plate fits nicely on a 5"x7" acrylic box frame!


The Crafter's Workshop small masks!!! TCW's Balzer Bits and Ronda's Fragments designed by our Gelli friends, Julie Fei-Fan Balzer and Ronda Palazzari are so perfect for printing with our small Gelli plates! And so easy to pack!


Derwent Inktense Pencils and Caran d'Ache NeoColor II crayons are both water-soluble. Great for adding more color and detail to your dry prints! And don't forget a pencil sharpener!


A Niji Waterbrush is an essential in any travel art bag! And Niji Pearlescent Watercolors add a sparkling touch to any print! Use the Waterbrush to blend colors and create washes with the Inktense Pencils and NeoColorII Crayons, too! A Ranger Mini Mister can come in handy when you want a spritz of water!


A set of fine point Micron Pens is another essential. Sharpie Water-based Metallic Extra Fine pens are a personal favorite for adding selective metallic details to almost any print!


For more doodling options, include Montana Acrylic Paint Markers! They're totally compatible with acrylic paint and great for working back into prints. Black and white are good for starters. And who doesn't love a Uni-Ball Signo White pen?!! A must-have, right?!! I think so!


Maybe alphabet stamps aren't on everyone's list, but they're such FUN! So toss in a set with a Ranger Archival Ink Black stamp pad and add some words to your prints, cards and journal pages!


The list goes on and on a few more fun and handy things to pack in your art travel bag include plastic needlepoint canvas shapes and a piece of punchinella. They hardly take up any room! Rubbing plates are also great texture tools that are easy to pack!

Catalyst Contours are sized just right for travelsmall and light. Roylco Paint Scrapers offer several more combing patterns and their flat shape makes them super handy to pack and easy to use!

For making collages with your printed papers, a few basics like a Cutter Bee Scissors with Safety Cover and UHU Glue Stick are great travel supplies! And throw in a few rolls of washi tape for the fun of it!

And let's not forget to include some Purell Hand Sanitizer and Wipes for cleaning things up!

There you have it! Enough cool supplies to keep you in Printmaking nirvana On-The-Go!!!

THIS GIVEAWAY IS NOW CLOSED!!!!

Ready for our HUGE Holiday Giveaway?!!!

We're stuffing ALL of these amazing supplies into a canvas bag for our most STUPENDOUS GIVEAWAY EVER!!! A Holiday Travel Art Bag Giveaway!!!


Enter our Spectacular Holiday Travel Art Bag Giveaway below. Check out all the options for entering the random drawing and choose one OR choose all the ways to enter!


Multiple entries allowed!a Rafflecopter giveaway  


A special thanks to our wonderful friends at DecoArt, Strathmore Paper and The Crafter's Workshop for their generous contributions to our Holiday Travel Art Bag Giveaway!!!

Happy Holidays from all of us at Gelli Arts!!!


Happy Printing and Good Luck!!!

Paper Mache Bowls with Gelli™ Prints!

$
0
0
If you're eyeing your pile of Gelli prints and scraps, wondering what you might do with all that luscious paper...think paper mache bowls! What a great way to create something fun and functional using papers from your Gelli stash!


Paper mache bowls have been around for ages. They range from children's school projects to fine art objects, and everything in between. Perfect inspiration for ALL of us!


There are so many ways to approach this project. You can tear or cut your prints into small
pieces or strips, or punch shapes—depending on the look you're going for. You'll need plenty of small pieces of Gelli prints! Thin paper, like copy paper works great! All of the Gelli printed snippets used here are from prints made on plain copy paper.


To make a durable bowl, you'll also need to prepare torn pieces of 'filler' paper for building up layers. Newspaper is commonly used for making paper mache. I have loads of old book pages that are perfect for this purpose, so that's what I used—along with unprinted newsprint paper.


TIP: Tear your paper into small pieces for a smoother bowl surface. Larger paper pieces can form lumpy folds and creases as it's applied to the curved surface.

To keep things simple, I chose Mod Podge for the adhesive—thinned down with a little water. There are many suitable adhesives and mediums you can use, such as matte medium or diluted white glue. Paste recipes are easy to find on the internet if you're inclined to make your own.


To begin, you need a form for the structure of your paper mache bowl. You can select a bowl with a shape you like, then tightly encase it in plastic wrap—but be warned: it can be a real challenge to remove the dried paper mache bowl intact. I find using a flexible plastic bowl much easier to work with than a rigid one. But my hands-down favorite form is a balloon. So that's the process described here.


Creating your bowl is a simple process, but it does take patience! Here's what to do:
  1. Blow up a balloon and tie a knot. Place the balloon in a cup to stabilize it. It helps to secure the balloon to the cup with tape.
  2. Pour some Mod Podge into a dish and stir in a little water, thinning it to the consistency of heavy cream. A foam brush is good for applying the adhesive, but I prefer to wear disposable gloves and use my hands. 
  3. Apply adhesive to a small piece of torn paper and smooth it onto the surface of the balloon, removing any air bubbles under the paper. Begin at the top of the balloon. Continue applying adhesive to each paper piece and placing onto the balloon, slightly overlapping the previous piece of paper. Do this until you create a solid layer that entirely covers the area of the balloon, forming the shape of your bowl.
  4. Allow the first layer to dry. Then add another layer. Build up layers, letting each one dry before adding the next. Each layer adds strength, and 5-6 layers should give you a bowl with a nice sturdy feel. Then let it dry overnight.
  5. To remove the completely dry bowl, simply pop the balloon! Take the deflated balloon out, revealing a smooth surface on the inside of your bowl.
  6. Trim along the edge with scissors to create an even rim. Or, if you prefer, leave the edge as-is for a more organic look. If you wish to paint the bowl, it's ready now!


The Gelli-printed pieces are the last layer. Arrange the cut, torn or punched pieces and glue
them to the bowl. Decorate the surfaces of the bowl, as you like. Let it dry, then varnish with a few more layers of Mod Podge or your favorite medium.


Pictured below is a bowl created on a large, fairly rigid plastic bowl. It was a little tricky to remove it when the paper mache was dry. Prying it off carefully and gently with a plastic palette knife worked best.


To decorate bowls like these, draw leaf shapes on many pieces of Gelli printed paper using a copper Montana Acrylic Paint marker (Fine—2mm). With a black Montana marker (Fine—2mm), add dots around each shape. Each black dot is layered with a small white dot from a Montana marker (Extra-Fine—0.7mm). Then cut out each small leaf shape with scissors. It's a slow, detailed process—quite like a meditation!


A few considerations: Keep in mind, the underside of the first layer will show as the 'inside' of the bowl. If you want the smooth interior of the bowl to be made up of pieces of Gelli prints, use those for the first layer of printed papers, placed face down on the balloon.

To make the different layers obvious while applying the small pieces of paper, I alternate layers of book pages and unprinted newsprint paper. This is by no means necessary, but it helps me see exactly where I am while creating each layer. It's easy to see if a spot was missed!

You can add a thin layer of molding paste or spackle to smooth out any lumpy areas. I use
Golden Hard Molding Paste, basically as a skim coat. I apply it with gloved hands and smooth it into a thin, even coat.

Once your paper mache bowl is decorated and dry, you may want to continue working on the surfaces. Add more collage elements, paint, stenciling, doodles or journaling to your bowls! The creative possibilities are endless!


So much fun! Try it!!! And share your photos with us on the Gelli Arts Facebook page showing what you've made! We love featuring creative works by our Gelli Arts fans!!! We also love reading your thoughts and feedback, so please leave a comment! Thanks!

Have Fun and Happy Printing!

Happy New Year from all of us at Gelli Arts! 

Gelli™ Printing: Patterns with Peel-Away Masks

$
0
0
Create amazing patterns in your Gelli prints by printing layers with re-positionable, reusable, peel-away chevron masks! Watch this video and see how easy it is to print an intentional and complex layered pattern using peel-away masks from Hazel and Ruby!


What's special about this technique is the amount of control you have over your final print, and how easy it is to achieve it!


Hazel and Ruby have a wonderful, on-trend selection of durable, re-usable, peel-away masks in a variety of images, graphic elements and bold alphabets in great font styles. Their self-adhering stencil mask material is also available in solid sheets so you can cut your own (by hand or a die-cutting machine).

Instead of placing masks directly on the Gelli plate as we typically do, the H&R peel-off masks have a low-tack adhesive that allows you to apply them directly to your printing paper—exactly where you want!

The H&R mask images and letters are fairly large—perfect for using with the BIG 12"x14" Gelli plate! The paper I'm printing on is 9"x12" Strathmore Bristol—to create bleed (borderless) prints.

All you do is peel the mask off the clear plastic backing sheet, press it onto your paper where you want it placed—then roll out paint on your Gelli plate and print as usual! There's no need to be concerned about reversals.


After you pull your print, peel off the masks. They're reusable, so it's recommended that you replace the masks on their original backing sheet and clean them off right away. It's easy to wipe the masks clean with a baby wipe while the paint is still wet. As seen in the video, sometimes they stick to the Gelli plate. Not a problem! They peel right off.


The real fun starts when you print additional layers on previously masked prints! With these
masks, you have total control over the placement of one element over another! Pull a print and when it's dry, place more masks where you want to preserve the previous print image. When that's dry, you can pull another layer on your print. It's so exciting to pull off the masks and reveal the layered image!


The paints you use in layered prints have an important impact on the final print image. You can achieve beautiful colors by using thin applications of transparent paints on each layer. Golden Open Acrylic paints work especially well for this. My go-to palette for transparent pigments is Quinacridone Nickel Azo Gold, Quinacridone Magenta and Manganese Blue Hue. I love the clean colors they create when they're masked and layered!


You can get a totally different effect using opaque paints vs. transparent paints. Here's an
example using various Golden Heavy Body opaque paint colors.


Using regular masks, it can be tricky to get precise placement when putting them on a painted plate. Being able to adhere your masks directly to the paper makes it simple! To get the effect in the print above, start with smaller circles. For each new layer, cover the previous printed circle image with a slightly larger circle mask.


So there you have it! Another way to create fascinating prints! Creating complex patterns from simple chevron masks can be just the beginning! These prints are a natural springboard for collage or doodling! This technique is great for everything from canvas wall art to journal pages, cards and more!


THIS GIVEAWAY IS NOW CLOSED!!!!

Winner is Judy H!
 
And here we go with another AWESOME giveaway!

This prize will have you making large layered, masked prints!


The prize kit includes:
1 - 12" x 14" Gelli Arts Gel Printing Plate
5 - Hazel and Ruby packages of Peel-Off Stencil Masks
3 - 4 oz. jars of Golden Open Acrylic paint
1 -9" x 12" Strathmore Bristol pad - 20 sheets
1 - Speedball 4" Soft Rubber Pop-In Brayer

All those goodies—and one more FUN thing...
By request, we've taken our 'Addicted to Gelli' badge beyond the virtual realm and made it a reality! So we're adding our brand new pin-backed metal badge to this giveaway!


To enter the giveaway, click on the red "ENTER GIVEAWAY HERE" button below! (This will ensure that we can contact the winner and that entries are limited to one per person. One winner will be selected from all the entries via a random number generator to receive this very special giveaway!) Entries will be accepted until Monday, January 26th, 2015 at 12 noon EST. Our lucky winner will be contacted by email and announced here on the blog and on our Facebook page no later than January 26th at 5 pm EST! 

THIS GIVEAWAY IS NOW CLOSED!!!!

Special thanks to our friends at Hazel & Ruby for their generous donation for our prize.


P.S. If you'd like to add our badge to your blog—you can grab the html code from the widget at the top of our blog!
Good Luck and Happy Printing! 

A Valentine Collage from Gelli Arts® - Winner of Tool of the Year at Creative World!

$
0
0
Before I get started... I want to share that the Gelli Arts® Gel Printing Plates just won 2nd place in the "Tool of the Year" category at CreativeWorld in Frankfurt! We are excited, proud and honored. Here are a few pictures from the special occasion.


Now back to our Valentine collage!

Every now and then, I go through my stacks of Gelliprints and separate them into four basic categories: Prints that are finished, prints that need additional printed layers, prints to work back into, and prints to tear or cut up to use in collage or for making paper cloth. When I'm ready to start a new project, my source material is relatively organized and ready to inspire! 


In addition to the colorful array of Gelli-printed papers to work with, my inspiration for this Valentine collage came from a Chinese proverb with a beautiful sentiment: 
An invisible red thread connects those destined to meet, regardless of time, place, or circumstances. The thread may stretch or tangle, but never break. —Chinese Proverb

Here are the steps for making a collage like this: 


This project began by sorting through a bin of Gelli prints that were previously cut into pieces. Some of the pieces are left over scraps from other collage projects and are quite small. Some are just slivers! For this collage I wanted to create a very flat, smooth surface, so the pieces I selected were all the same weight—in this case, copy paper—with lots of color! 


The base for this collage is a 12x12 Blick Studio Artists' Board - Gallery Panel. The paper pieces can be glued directly to the panel with matte medium or your favorite paper adhesive. But that's not how I chose to approach this particular collage, so I'll include the details of my process. 


Instead of glueing the collage together, I arranged the snippets on Steam A Seam 2— a double stick fusible web. It's a sticky adhesive layer between backing sheets on each side. To use it, remove the paper from one side. Arrange your collage papers on the sticky fusible surface. They'll stay put temporarily —the pieces can be moved around until you're ready to fuse them for a permanent bond. To fuse the pieces, cover with parchment paper and press with a hot iron following the manufacturer's instructions. 


Remove the remaining backing sheet and fuse the collage to your substrate. Or, you can fuse it to a medium-weight interfacing first—in case you want to machine sew or hand stitch on the collage. Not essential, but a good option if you sew on paper. As it turned out, I fused the collage onto interfacing, but ultimately decided not to sew on it. Regardless of whether you've sewn the collage or not, the next step is to adhere the interfacing to your final substrate (the Blick panel). You can use matte medium or the adhesive of your choice. Let it dry completely. Trim any excess collage edges flush against the panel on a cutting mat with an Xacto knife. 


Brush several coats of DecoArt Media Gloss Varnish on the collage to seal the surface, allowing each coat to dry before adding the next. Paint or collage the sides of the panel. 


If you want to add words to the piece in your handwriting—acrylic pens, like Montana PaintMarkers, work well over acrylic paints. Or you can transfer a laser-toner printed version, as I did. There are many ways to transfer an image. Here's how this one was done: 


  1. Create a mirror-image and print it with a laser printer. The words must be reversed. Inkjet prints won't work for this technique. 
  2. Brush several coats of gloss medium onto the print, allowing each coat to dry before adding the next. I used DecoArt Media Gloss Varnish and it worked great! 
  3. If you haven't varnished the collage, you'll need to give it a few coats of medium (gloss seems to work best for this method of image transfer). 
  4. Let everything dry. Then place your image face down on the collage where you want it to transfer. 
  5. Iron it in place with a hot iron, bonding the paper to the collage surface. 
  6. Apply water to the back of the paper and let it soak in. Gently rub the paper away to reveal your transfer! 
  7. When all of the paper has been rubbed away, brush a coat of medium over your transfer to seal it. 


The collage has two heart embellishments. They're fun to create—and add a meaningful Valentine message! 


Here's how to make a heart like this one: 

  1. Run a fairly long piece of red thread through a small puddle of fabric stiffener. I used 6- strand embroidery floss and Fabric Stiffener by Crafter's Pick
  2. Arrange the thread to create a heart shape on a piece of freezer paper. Let it dry and harden. Then carefully remove it with a palette knife. 
  3. Glue the stiffened heart-shape onto a scrap of Gelli-printed cardstock. Let it dry, then trim close along the heart edge with scissors. It's an interesting collage element as is, but you can paint it. I rubbed it with several colors of DecoArt Metallic Lustre, then buffed it to a shine. I absolutely love this stuff! 


Here's how to make the other heart: 


  1. Draw a heart-shaped design on a piece of Gelli-printed cardstock using red metallic dimensional paint. 
  2. Let it dry completely, then trim along the edge of the heart design. 
  3. Rub a little gold DecoArt Metallic Lustre along the very top of the dimensional paint design— and buff with a paper towel to make it shine. 


To complete the collage: 
  1. Stitch one tiny X on each heart with red embroidery floss. 
  2. Adhere the hearts to the collage. I used double sticky foam to add more dimension. 
  3. Arrange the red thread (6-strand floss) in a meandering design, connecting the two hearts— and glue in place. 


Have fun making heart-inspired collages and Valentine's Day art!

Remember, we now have Gelli partners all over the world so it'seasier than ever to find a Gelliretailer near you!

Happy Printing! 
 

Gelli™ Printing with DIY Foam Printing Plate Stamps!

$
0
0
Easy-to-make foam printing plate stamps create fabulous texturedGelli prints! Watch this video to see how to create DIY foam stamps for unique prints on cards! 


They're so easy and fun to make, you'll have a collection of these stamps in no time! 


Express your creativity by making the stamps for printing your cards! 


There's a variety of materials that you can use to make a texture stamp. Here we're using thin sheets of foam—available at art stores for use as printmaking plates. It cuts easily with scissors or a craft knife—and drawing into it with a pen, pencil, stylus or other pointed tool gives you endless design opportunities! 


Decorative-edge scissors cut smoothly through the thin foam material—and hand punches work well too! If you have a die-cutting machine (like a Cuttlebug, etc.)—you can run it through with an embossing folder and create a very cool embossed surface on the foam. Then cut your own shapes from the embossed printing foam! 


Instead of the foam sheets for printmaking, you can also use styrofoam plates or repurposed clean food trays. 

Incise lines into the pieces with a pencil, ballpoint pen or stylus. Cut or punch out some small areas. The design can be simple shapes, or as intricate as you want. You can plan your design beforehand, or just wing it! 


As you make your marks in the foam, keep in mind that what you see is what you get. So that means you can write words in the foam too! No need to figure out reversals—how perfect for adding a sentiment to your cards! 


The prints in the video are made on the 5"x7" Gelli plate—using Amsterdam Standard Series Acrylic paintsand Pebeo Studio Acrylics


Strathmore has a new line of printmaking paper and they've made it into beautiful card and envelope sets. The cards and envelopes shown here are all printed on Strathmore Printmaking Cards.


The following steps describe the process shown in the video for creating the Gelli printed card: 
  1. Roll a thin layer of acrylic paint onto the Gelli plate with a brayer 
  2. Press a texture tool (like bubble wrap) into the paint 
  3. Cover with your card and pull a print 
  4. Wipe the plate clean (not essential—but makes a nice clean print) 
  5. Roll a layer of a contrasting color onto the plate with a brayer 
  6. Place your foam stamps on the painted plate 
  7. Cover with thin paper (such as deli paper)—to press the stamps into the paint and remove the paint from the plate around the stamps 
  8. Remove the cover paper and remove the foam stamps 
  9. Place your printed card on the Gelli plate to print a second layer 
  10. Rub to transfer the paint and pull your print—the second layer on your card!
TIP: Your printed image will 'pop' more if the paint colors for each layer are of different value (light/dark). You'll get very different results with transparent paints vs. opaque ones. Metallic paints also offer an exciting option as one of the layers. 


While you're printing your cards, also print on the envelopes! 

There are various ways to create a blank space for the address. Here are a few suggestions: 
  • Strategically place a piece of torn or cut paper on the painted, stamped Gelli plate to create a blank space. 
  • Place a removable label on the envelope as a mask. Print over it—then remove the label. 
  • Scrape or wipe off an area of wet paint on the Gelli plate, then print your envelope. 


Receiving hand-printed cards and envelopes is always special! Printing your unique stamp images on beautiful paper enhances your artwork and shows the love! 

THIS GIVEAWAY IS NOW CLOSED!!!!

Winner is Roberta K!

 
And to show OUR love—we have an exceptional GIVEAWAY for cardmaking!!! 


The prize kit includes: 

1 - 5"x7" Gelli Arts Gel Printing Plate 
1 - Strathmore Printmaking Cards - Package of 50 Cards and Envelopes 
8 - Amsterdam Standard Series Acrylic Paint - 120 ml tubes (4.1 fl. oz.) 
1 - Speedball 4" Pop-In Soft Rubber Brayer
1 - Inovart 'Presto' Foam Printing Plates - Package of 20 - 9"x12" sheets 

To enter the giveaway, click on the red "ENTER GIVEAWAY HERE" button below! (This will ensure that we can contact the winner and that entries are limited to one per person. One winner will be selected from all the entries via a random number generator to receive this very special giveaway!) 

Entries will be accepted until Wednesday, February 25th at 1pm. Our lucky winner will be contacted by email and announced here on the blog and on our Facebook page no later than Wednesday, the 25th at 5pm


THIS GIVEAWAY IS NOW CLOSED!!!!


Special thanks to our friends at Strathmore for their generous donation to our giveaway prize! 

Remember, we now have Gelli partners all over the world, so it's easier than ever to find a Gelli retailer near you! 


Good Luck and Happy Printing! 

Printing and Stamping with our NEW 4" and 6" Round Gelli™ Plates!

$
0
0
Gelli printing is going in CIRCLES! Introducing two NEW round Gelli plate sizes— a 6" round and a 4" round! The perfect compliments to our 8" round plate! 


Oh the fun!!! Now you can use all three round plates together to create exciting prints designed with varied circular imprints! You won't believe how easy it is to achieve amazing prints by overlapping circular images, layering the round sizes, and switching between transparent and opaque paints! The design opportunities are truly endless! 


The two new round plates each work beautifully as stamps when stuck onto a piece of acrylic or acrylic stamping blocks. The 8" round plate works great as a stamp when pressed onto the bottom of an 8-1/2"x11" acrylic box frame. Using the round plates as stamps allows you to place the images right where you want them! That's great when you're overlapping images. 


Have you wanted to print your own fabric for a sewing or quilting project? Try stamping circle prints in different sizes all over a piece of fabric! What a great way to cover a large area! 

Printing your own fabric is so rewarding—and totally unique. I'm starting with a 16" square pillow. It takes a printed piece of fabric measuring 17" x 40". That's a whole lot of fun to Gelli print! 


For this pillow project, I chose drill cloth—a tightly woven 100% cotton medium-weight fabric that's very durable and easy to work with. It's unbleached and has a natural color, similar to unprimed canvas. Typically, when printing on fabric, I temporarily stabilize the fabric by ironing it onto a piece of freezer paper, which peels away easily after the printing is done. However, the substantial drill cloth is perfect for printing as is—so no need to stabilize it. 

I used DecoArt's Multi-Surface Satin Acrylics and SoSoft with great results. When printing on fabric, use a heavier application of paint on the gel plate than when printing on paper. 


Create images using your favorite texture tools and techniques. I've used stencils, rubbing plates, embossed paper, combs, and a variety of found textures like corrugated cardboard and bubble wrap. There's lots of room to play when you're printing up a larger piece of fabric! 


When the round Gelli plates are placed on an acrylic (clear) base, you can layer stamped images with some precision. Many of the impressions on my fabric were made by first stamping a solid opaque color, then stamping directly over it with a textured image—using stencils, combs, and other tools—in a different color. 


Mixing it up with opaque and transparent paints in different layers makes exciting prints. Playing with different color combinations adds even more fun! But keep the color wheel in mind to avoid making mud. When in doubt, use colors that live next to each other on the color wheel. 


If you make an impression you aren't so happy with—here's an easy fix: Stamp over it again with titanium white (or a solid opaque color)—and have another go at it! It can be that easy to undo a yucky color! 


The overlapping areas of the circle images give a certain dimension to the overall print, as some prints are in front and some recede. You can enhance the dimensional aspect by adding shadows and highlights with colored pencils, paint and markers. Doodlers will find tons of inspiration in circle prints—on paper and fabric! There are plenty of pens, markers and pencils that work great on fabric. So many options! 


If your idea of fun is pulling print after print—try stamping with three round plate sizes to cover a large piece of fabric with fabulous circular images! Pure bliss! 


Here are the steps for how I made this super-easy pillow. If you need visual step-by-step instructions for making a simple pillow, they're all over the internet. 

The pillow form I used is a 16" square. To make the pillow cover, it required a 17" x 40" piece of fabric. 

The measurements are based on the size of your pillow. Add 1 inch to the width of your pillow size. For the length, double the pillow size and add 6 inches. 

  1. To create a finished edge on the short sides, fold the hem a half inch and press (wrong sides together). Then turn up another half inch and press again. Stitch along the edge of the inside fold. Do this on both short sides. 
  2. Lay your printed fabric right side up on a table, positioned vertically. 
  3. Bring the bottom edge up past the center (no need for exact measuring yet) 
  4. Bring the top edge down past the center point so that your folded pillow fabric now measures exactly the same as your pillow form. (In my case, 16 inches) TIP: You can tweak the placement of the top and bottom folds—but make sure the folded fabric ends up measuring the same as your pillow form. 
  5. Make sure the sides are lined up together. The top hem should overlap the bottom by about 4 inches. 
  6. Pin the sides in place. 
  7. Sew the side seams with a half inch seam allowance. 
  8. Turn the pillow cover right-side out, through the opening. If needed, use a knitting needle or other blunt pointy tool to poke out the corners. 
  9. Insert your pillow form into the opening and finesse it into place. You're done! 


I'm hooked on printing fabric and making pillows! Sew much fun :) Give it a try!!! 

Remember, we now have Gelli partners all over the world, so it's easier than ever to find a Gelli retailer near you! 
 
Happy Printing! 

Gelli™ Stamping: Layered Circles & Giveaway!

$
0
0
WOW! Gelli plates in three ROUND sizes!! Triple the fun for stamping circle prints! Watch this fast-paced video showing the 4", 6" and 8" round plates in action — on an art journal spread with layered, overlapping circle stamped images! 


Our round plate news is out! And the verdict is in! The new 4" and 6" round Gelli plates are irresistible! Use them along with our 8" round plate — and take circle imagery to a whole new level!


You may have already seen that Gelli plates function perfectly as stamps when placed on an acrylic block or acrylic sheet. 

Once the Gelli plate is on an acrylic block, apply paint to the gel surface and roll into a smooth layer with a brayer. Make your marks in the wet paint and press onto your surface to stamp your image. It's that easy!


When using a stencil, it's easiest to place it directly on your substrate. Stamp your painted Gelli plate right over it — then pick up your gel plate and remove the stencil. The stencil may stick to the gel plate, so don't be surprised if both come off together.


The real excitement in stamping with your Gelli plate is how easy it is to layer the printed images! Aligning each imprint is simple because you can see through the clear mount. 


There's no guesswork in overlapping images when you stamp your Gelli plates onto your surface. Place your circle imprints right where you want them! Overlapping circle prints create a dimensional appearance — with some in front and others in back.


Use your favorite acrylic paints — with any techniques and texture tools of your choice — to create dynamic stamped layers. Have a blast covering large areas with layered images using the 3 different size gel plates! Stamp up an entire spread in your art journal, or a piece of fabric, or a large art board or canvas. Go WILD!!!


In the video, I'm filling a spread in a Strathmore Watercolor Art Journal (7.75 in. x 9.75 in.) with layered, stamped circle images. The 140 lb. cold-press paper holds up beautifully to the layers of acrylic paint! It lays flat when open, so it's a great journal for Gelli stamping.

And, it's a perfect surface for adding watercolor or paint pen doodles — especially if you leave some blank (negative) space between some of your circles to work back into. Derwent's Graphik Line Painter 0.5 markers produce a juicy thin line of paint — and can also be used for splatter and drip techniques!  


Stamping circles is beyond fun — it's totally addicting! Each stamped circle is layered with another! And those are overlapped with more circles — and more layers! The journal spread gives me room to keep going! That's a good thing — because I CAN'T STOP!!!


Looking for a fabric project? Be sure to check out my previous blog post tutorial for making a circle-stamped pillow. You'll also find more information there about stamping layered circle prints.


Gelli Arts® is 'printing in circles' and we couldn't be happier! To share the joy, we have a thrilling GIVEAWAYto start one of you printing in circles too!!


The Prize Kit includes: 

To enter the giveaway, click on the red "ENTER GIVEAWAY HERE" button below! (This will ensure that we can contact the winner and that entries are limited to one per person. One winner will be selected from all the entries via a random number generator to receive this very special giveaway!) 

Entries will be accepted until Tuesday, March 24th at 5pm. Our lucky winner will be contacted by email and announced here on the blog and on our Facebook page no later than Wednesday, March 25th at 12pm. 


Remember, we now have Gelli partners all over the world, so it's easier than ever to find a Gelli retailer near you! 

Good Luck and Happy Printing!


Stamping with Round Gelli® Plates on a Silk Scarf!

$
0
0
Looking for a perfect substrate for stamping with 4",6" and 8" Round Gelli® plates? I found one I'm really excited about!!

It's a blank 8mm habotai silk scarf measuring — 14"x72" — from Dharma Trading Company! They offer a fabulous variety of options, and this size is exactly what I was looking for.


The sheer and lightweight habotai silk (also known as 'China silk') is easiest to print on if you first stabilize it by ironing the scarf onto freezer paper. And because this scarf is 6 feet long — you can easily roll up the freezer paper and unroll as you work on sections.


I used plastic clips to keep the scarf neatly rolled up while I worked on one area at a time.


To stamp with a Gelli® plate, place the plate on an acrylic block or sheet. Clear mounts let you place your imprint where you want it. I use an 8-1/2 x 11 inch acrylic box frame to mount my 8" round Gelli® plate. It works great for stamping! The gel plates will stay in place on their acrylic mounts until you remove them.


Maintaining the soft hand of the silk fabric is important for the scarf to drape nicely. There are paints specifically made for painting on silk, but they are very thin and tend to bead up on the gel plate — so they don't work well for monoprinting or stamping.


I used DecoArt's SoSoft Fabric Paint and find it leaves the fabric nice and soft. However, it's important not to use a thick application of paint. This is not the ideal project for layered paint techniques. If paint builds up on the sheer fabric, it changes the hand.


Instead of rolling a layer of paint on the gel plate with a brayer as I usually do, I painted thin layers with a flat brush. I love the look of loose brushstrokes in the circle images! And it's so much fun blending colors and swirling brushstrokes — going in circles!


All marks and designs on the painted gel plate were made using the following tools:

The result is a painterly look, which works nicely with the soft silk.


This is a fast and fun process. Here are the steps — Easy as 1-2-3!!
  1. Brush fabric paint onto the gel plate with painterly brushstrokes.
  2. Make subtractive marks in the wet paint with combs and soft-tipped tools.
  3. Stamp the painted plate onto the fabric.

I worked from one end of the scarf to the mid-point — then started at the other end and worked back to the middle. But if you prefer, you can easily work from one end to the other. Using the three round plate sizes makes it especially easy to fit the circle images together into a harmonious design. And variation in the circle sizes adds visual interest to the overall pattern.


TIPS:

To keep your colors clean while brushing them onto the plate — use analogous colors. Those are the ones that are next to each other on the color wheel.


Another simple, but sometimes overlooked, tip for clean colors is to give your brush a good rinse before switching colors. It's amazing how quickly colors can turn to mud if you don't.


For this project — after each print — I wiped the plate with a spritz of water and a paper towel to remove any residual paint on the plate. It only takes a second and helps keep the colors clean and bright.


SoSoft Paints don't require heat-setting — and they dry quickly so you can keep moving on to the next area.


You'll notice for this project I chose not to overlap the circle imprints. Mostly, because I wanted the design to feature individual circles! But also, I wanted to avoid overlapping images where layered paint might build up and alter the hand of the fabric.


After the scarf is Gelli® printed — it's done and ready to wear!


Now isn't this the perfect Spring accessory! A beautiful and breezy handprinted scarf! Go ahead and make one...or a few...and remember, it's a wonderful Mother's Day gift!!


Remember, we now have Gelli® partners all over the world, so it's easier than ever to find a Gelli® retailer near you! 

Gelli® Plates with ScanNCut Stencils & Masks — Your Chance to Win Big!

$
0
0
You almost have to wonder if the ingenious folks at Brother had Gelli® printing in mind when they created their amazing ScanNCut cutting machine! These pair together like they were made for each other! Watch this video and see custom-designed ScanNCut stencils and masks in action with the 6x6" Square and the new 4" and 6" Round Gelli plates!


The first thing that happens when unboxing the ScanNCut is an overwhelming feeling of excitement and possibilities! All the stencil and mask designs you can dream up are now at your fingertips!


Brother says:  "See it. Scan it. Cut it. Create it." And it's TRUE!!! Imagine turning your own drawings, computer-generated designs, and patterns that come in the ScanNcut machine, into stencils and masks! It's the ultimate in immediate gratification!


An essential feature of the ScanNCut is its ability to size, or scale, your design before you cut it. That's such a great thing when you're working with different-sized Gelli® plates! I was able to create unique masks designed to use with the 4" and 6" Round plates! Talk about versatile!!


The stencil material I use is Grafix Edge Stencil Film, which comes on a roll (20" x 25'). I went ahead and cut a stack of 10" squares on my cutting mat with a rotary cutter and quilting ruler. It's great to have plenty of pre-cut stencil film ready to use.


I also cut stencils and masks from 110 lb. heavy card stock — and while it's not as durable as the stencil film, it works great!


There's good news too for those of you who prefer to skip the design step and dig right in. The ScanNCut comes with over 600 built-in images for you to use. So you don't have to draw the images if that's not your inclination. I had a great results creating stencil patterns using some of the design elements that come in the machine!


The ScanNCut has so many features and functions it would be impossible for me to explain it all in this blog post. But I can direct you to the fabulous and talented artist, Julie Balzer, who is an official Brother spokesperson for ScanNCut. Julie has numerous excellent instructional videos online — in which she clearly explains different features — and inspiring and creative ways to use the ScanNCut. Julie's enthusiasm got me hooked!

And if you're looking for additional how-to info, you'll find loads of other video tutorials from Brother International Corporation, paper crafters, and quilters online.


Now I'd like to share a fun little technique that's great to use with stencils and masks! Making a drop shadow image!


The following instructions are for stamping with your gel plate (mounted on acrylic blocks):

Here's how:
  1. Roll a mid-value paint color onto the plate and print onto your substrate.
  2. Place stencil on the printed area.
  3. Roll a dark paint onto the gel plate.
  4. Print the dark paint through the 'holes' in stencil or mask using the gel plate as a stamp. Remove stencil. Let paint dry.
  5. Place same stencil over the previous impression, aligning the stencil holesthen move the stencil over about an 1/8 of an inch and up a little.
  6. Roll a light value paint onto the gel plate and stamp again over the stencil. This creates the drop shadow effect! And it's so easy!

What a great way to add a dimensional look to your stencil image! Easy and fun!


NOTE:  The stencils I created from the rolled film have a bit of curl to them. You'll notice in the video that the curl can make it a little trickier to get exact placement before stamping over them. Stencil material is available in flat sheets, and might be a little easier to work with.


The prints in the video were all made using Blick Matte Acrylics. They work beautifully for layering to achieve the drop shadow images. And their matte finish makes it easy to work back into the print with colored pencils, markers, pastels, and collage.


So far, I've focused on making stencils and masks for Gelli® printing. But the ScanNCut opens up a whole universe for creative cutting to make whatever Gelli® printed paper and fabric project you can imagine!


If I sound like a serious ScanNCut enthusiast, it's because I am! I'm not a paid spokesperson — I just love the endless world of possibilities this machine presents! Both for monoprinting — and way beyond!


Have you sensed by now that something SPECIAL is brewing for our GIVEAWAY??!!!!

If you've guessed it's a Brother ScanNCut...you guessed RIGHT!!!

Thanks to our wonderful and generous friends at Brother International Corporation for providing a ScanNCut machine we'll have the enormous pleasure of sending it to one VERY lucky winner!

And a Gelli Arts® Giveaway wouldn't be complete without Gelli® plates!

Ready for our Grand Prize Giveaway?!!!


Enter our Special ScanNCut and Gelli Arts® Gel Printing Plate Giveaway below. Check out all the options for entering the random drawing and choose one OR choose all the ways to enter!

Multiple entries allowed!

We're as excited as you are about this AMAZING opportunity to win this AWESOME PRIZE PACKAGE!!

Remember, we now have Gelli® partners all over the world, so it's easier than ever to find a Gelli® retailer near you! 


Grafix Edge Stencil Film
Rotary Cutter
Quilting Ruler
110 lb HeavyCardstock Paper
Acrylic Blocks
Blick Matte Acrylics

Reverse Decoupage with Gelli® Plate Prints!

$
0
0
Recently, I've been exploring some of the creative aspects of paper cutting with the impressive ScanNCut machine.


All of which resulted in lots of fabulous cut paper pieces to work with!


While sorting through the cut shapes and images, I became intrigued with the idea of arranging and collaging them onto the back of a glass plate — a process called 'reverse decoupage'.


The prints I selected for this project from my stash are printed on copy paper. It's a good weight for this collage method.


I'm interested in tessellating patterns, and chose the equilateral triangle shape — a very simple one that tiles together with no overlaps or gaps. I used the ScanNCut pattern already available in the machine, which made the cutting so easy!


Here are the steps for reverse decoupage:
  1. Prepare white glue for decoupage by mixing it with water. I use Elmer's Glue Alland mix it 2 parts glue to 1 part water.
  2. The glass must be clean, so wash it first with dish soap and water. Rinse and dry with a paper towel. Use glass cleaner or alcohol if needed. Take extra care not to leave fingerprints.
  3. Place the glass plate upside-down on your work surface. You'll be working on the underside. It's easier to work on the plate if you rest it on a wide-mouth plastic container.
  4. Brush the decoupage glue onto the glass surface in a fairly thick, even coat with a foam brush. The glue goes on white, but dries clear.
  5. Dip each cut paper piece in a dish of water as you're working. It'll curl up and then relax. Remove from the water dish and blot away excess water. Now it's ready to add to the glue-covered glass surface
  6. Place the cut paper shape on the glue-covered surface and apply more glue over it. Take care in arranging the cut paper elements — they're prone to sliding. Turn the plate over to check the placement.
  7. Gently press out any air bubbles and excess glue and wipe away. After the papers are all glued on, cover the whole surface with another coat of glue to seal everything.
  8. Allow to dry completely. Overnight is recommended. I helped speed up the drying with a heat gun, which worked well.
  9. After the paper is dry, use a craft knife against the rim and carefully cut off the excess paper. If needed, you can use an emery board of fine sanding block to smooth the edge. 
  10. Paint the back of the plate with acrylic paint. Let dry. (see image below)          
  11. Finish with a few coats of acrylic varnish over the dry paint. Let dry.
  12. Clean any glue from the front of the glass with glass cleaner and paper towels


NOTE:  Dishes created with reverse decoupage are not dishwasher-proof, but  can be wiped clean. So theyre functional — as long as you don't submerge in water.


TIPS:
  • Be sure to use enough glue on the glass, under the papers.
  • It's important not to remove too much glue while pressing out air bubbles. When the plate is dry, you can have streaky areas and shiny spots where there wasn't enough glue.
  • It can take a little practice to get the amount of glue just right — and to get the hang of pressing out the air bubbles without removing too much of the glue. Be patient. It's worth the effort!
  • If using any inkjet images, check first to make sure the ink won't run when wet. Spray inkjet prints with fixative if necessary.
  • Sponging on a few layers of acrylic paint on the back of the plate creates a slightly textured and tactile surface.

Here's what I learned:  Tessellating pieces will work best on a perfectly flat surface. The curve of the plate keeps the pieces from fitting perfectly together. Also, saturated papers are not the same exact size as dry ones, so it can be a bit challenging to get them all fitting together seamlessly.


When this happens, seize the opportunity and paint the back with metallic paint. You'll have beautiful slivers of metallic shine that show through the glass, filling in any gaps. Quite lovely!


There's so much potential to transform glass into fabulous art! Picture frames with glass are perfect for this process! This one is 8x10 inches. What a great way to use your Gelli® prints to create a fabulous piece of framed wall art!!


Here's how to create reverse decoupage framed art:
  1. Remove glass from the picture frame. Be careful handling the cut glass edges. I apply low-tack painters tape around the edges of the glass for safer handling.
  2. Cut out a focal image, if desired. I used the Direct Cut feature on the ScanNCut machine to fussy-cut a floral designand it worked great. A huge time-saver! But the image I selected had too much detail for the scanner to fully readit only saw the outline. So I cut out the inside blank areas with a craft knife. Then my floral print was ready to use! Easy! *Note:  This floral design is clip art from the DoverPictura "Flowers CD-Rom/Book ImageArchive" (royalty free artwork). However, you can find lots of downloadable copyright-free images available on the internet from many sources. My floral image is an inkjet print and didn't run when tested with water. Before using an inkjet image, be sure to test it first.
  3. Select a Gelli® print for the background. You can use cut or torn pieces, or an entire print as shown here.
  4. Follow the steps shown above (glass plate project) for gluing the paper pieces in place.
  5. As the background paper is applied to the glass, the saturated edges are easy to tear. Remove a small margin, if desired. The blank area on the glass is perfect for applying gold metal leaf — creating a beautiful imperfect edge around your print! Wipe the excess glue off the bare glass areas and allow the papers to dry.
  6. Apply Duo Adhesive (or any glue that is tacky when dry) to the blank glass areas. Allow it to dry — it will turn clear and remain sticky to the touch. Place pieces of gold metal leaf on the sticky areas, then brush off excess metal leaf with a soft brush. Done!
  7. Clean the front of the glass with glass cleaner and insert into the frame. It's ready to hang or give as a lovely gift!!
Note:  The background Gelli® print on this framed piece is a viscosity print. To learn more about how to make a viscosity print, please see my previous blog post "Thick and Thin Gelli® Printing" from August 15, 2013. There's also a video that shows the process.


Reverse decoupage is a wonderful and creative way to use your monoprinted papers! You won't look at any clear glass item without thinking of its creative possibilities!

Remember, we now have Gelli® partners all over the world, so it's easier than ever to find a Gelli® retailer near you!

Have Fun and Happy Printing!


Materials used for today's project:

Brothers ScanNCut
Glass Plate
Elmer's Glue-All
Foam Brush
Heat Gun
DecoArt Dazzling
Metallic Acrylic
DecoArt Media
Acrylic Varnish
8x10" Picture Frame
Low-Tack PainterTape
Craft Knife
DoverPictura
"Flower"
Gold Metal Leaf
Duo Adhesive


Gelli™ Printing: Dark Over Light

$
0
0
Apply layers of light paint with a DIY sponge dauber, let it dry—then brayer dark paint over it and pull your print. Watch this Gelli video to see it demonstrated step-by-step!


There are many possible variations using this technique. This time, we'll apply the paint from light to dark to produce interesting print effects.


To start, let's make a sponge dauber using a round cosmetic sponge and masking tape. To do this, simply gather the edges of the sponge together, forming a ball of sorts. Wrap the gathered edges in masking tape, which forms the dauber and serves as a convenient handle.


The paints used in this video are DecoArt Media Fluid Acrylic paints, and DecoArt Dazzling Metallics. They're wonderful for this technique!


The key is to allow the painted image to dry on the plate. This technique is perfect for using thin applications of fast-drying acrylics! If you like to take time to develop an image on your plate and have been frustrated with fast drying paint... give this technique a try!


Here's how:
  1. Apply light colors to your Gelli plate with a sponge dauber.
  • Leave areas of the gel plate unpainted.
  • Add focal points and patterns by dabbing paint through stencils
  • Allow paint to dry thoroughly.
  • Load your brayer with a dark color and roll it over the dry paint on your Gelli plate.
  • Quickly cover with your printing paper, rub to transfer the paint — and slowly pull your print. This should pull up just about all of the paint on the plate.


  • This is a simple technique, but here are a few things to keep in mind:
    • Use fast-drying acrylic paints.
    • Avoid any blobs or thick applications of paint since they take a while to dry.
    • Allow the painted image to dry completely. (Do NOT use heat to hurry the drying!)
    • Roll a thin layer of paint over the dry paint — then quickly cover with paper.
    • Give a little extra time when rubbing to transfer the paint to the paper.
    • Pull the print slowly. The paper can tend to stick to the plate a bit as you pull the print.

    Here are a few variations to try:
    • Use metallic and/or interference paints. They'll pop against the final dark layer.
    • For a painterly print, apply the paint with a soft brush instead of a sponge dauber.
    • Press texture tools into the paint while it's wet.
    • Experiment with different color combinations for very different results. Be sure to create enough contrast.


    The dry layers of sponged paint created some unexpected interesting paint textures! 


    These prints can be great beginnings, too! Add doodling on them with paint pens, colored pencils and your favorite drawing media.


    As you can see, there's great potential for creative explorations in printing with dark over 
    light colors. Have fun!

    This Contest is officially CLOSED


    Judi W. is our Winner!!


    And we have a SPECTACULAR GIVEAWAY!!! Including a signed copy of my new book, Gelli Plate Printing!


    Our incredible Prize Package includes:
    Leave us a comment below and let us know your thoughts on the blog  - we love hearing your feedback. 

    To enter the giveaway, click on the red "ENTER GIVEAWAY HERE" button below! (This will 
    ensure that we can contact the winner and that entries are limited to one per person. One 
    winner will be selected from all the entries via a random number generator to receive this 
    fabulous giveaway!) 

    Entries will be accepted until (Monday, Oct. 20th, 2014 at 12 Noon EST). Our lucky winner will be contacted by email and announced here on the blog and on our Facebook page no later than (Oct. 20th at 5 p.m. EST)!


    This Contest is officially CLOSED 


    Special thanks to our friends at DecoArt for generously providing the paints in this giveaway!

    Good Luck and Happy Printing!


    Gelli® Plate Printing with DIY & Found Textures!

    $
    0
    0
    Have you been overlooking some readily available, fun textures for creating great images in your Gelli® prints? 

    Watch this video and refresh your printing experience with textures from everyday items! What FUN!!!


    With the dizzying array of stencil designs, stamps, embossing folders and other fun texture tools in the marketplace it's easy to lose sight of some of the most exciting ways to create wonderful texture in your prints — using common household items and found materials!


    Here's a handy list of some great texture items you may already have on handhave fun & experiment!
      • String, Thread, and Yarn
      • Rubber Bands
      • Credit Cards, Hotel Key Cards, etc.
      • Plastic Wrap
      • Wax Paper
      • Cotton Swabs
      • Bottle Caps and Jar Lids
      • Disposable Cups
      • Straws
      • Pencil Erasers
      • Leaves and Botanicals
      • Feathers
      • Cheesecloth
      • Burlap
      • Sponges
      • Textured Fabrics
      • Textured Wallpaper (Anaglypta)
      • Corrugated Cardboard
      • Toilet Paper Cardboard Rolls
      • Plastic Shelf Liner
      • Bubble Wrap
      • Doilies


    Another useful supply you may already have on hand — 3x5 inch index cards! They're perfectly sized for masking the 3x5 inch Gelli® plate! Not only do they work great for this purpose — but you also get great printed cards from using them as masks!


    The paint used in all of these prints is Golden® Open Slow-Dry Acrylics. A small amount of this paint goes a long way! And after you've pulled a print, the second (ghost) print can reveal the most amazing — almost photographic — details. Sometimes a pale third pull is possible — even when it looks like there's hardly any paint left on the plate! Create beautiful images — especially effective as ghost images from leaves and other highly detailed textures.      
                                                                                                                                            

    Golden Artist Colors also makes Open Acrylic Medium — in gloss and matte. Add this to any acrylic paint to extend its working time. As we head into summer — and for those of you in hot, dry climates — this may be just what you need to keep your paints — any acrylic paints — from drying too fast. For Gelli® printing, that can be a huge benefit!


    The paper used for the prints in the video is Yasutomo Kozo Rice Paper. I cut 8.5" pieces from an 11" x 60' roll. The cut pieces had some curl to them, so I took a few minutes to iron them flat — not really necessary, but to me it's worth the extra effort to work with nice flat sheets.


    I also created prints on paper from a pad of Hosho rice paper by Aitoh.


    Both of these rice papers have a smooth side and a rough side. Printing on the smooth side with Golden Open Slow-Drying Acrylics gives you a beautiful printed image.

    TIP:  When the paint on the gel plate is too dry — rice paper can tend to stick to the plate and tear when you pull the print. If you find that happening, either use a little more paint or add Open Medium. Adding water can create a soggy mess with rice paper!

    Instead of cutting rice paper — use a water tear to get beautiful feathery edges. To do a water tear — wet a clean pointed brush with water and 'draw' a line where you wish to tear the paper. Gently push the pieces apart along the water line. The paper tears easily and has a natural-looking edge. This is a great technique for using pieces of rice paper prints in collage, as you can tear it into any shape.


    Here's a process for working with your found textures to make prints like those demonstrated in the video — using the 8x10 and 3x5 inch Gelli® plates together! So look around for textures and get ready to make some unique prints! For this process, the 3x5 inch Gelli® plate is mounted on an acrylic block and used as a stamp. 

    (p.s. For more on using the 3x5 printing plate for stamping... watch this video.)

    1. Apply two colors of acrylic paint to an 8x10 Gelli® plate and roll into a thin layer with a brayer. To create a gradient effect, apply each color to opposite sides of the plate. Roll out the lighter color on one half of the plate — then roll out the other color — meeting in the middle of the plate.
    2. Apply a textured item into the paint. Some textures can be pressed into the paint and removed (i.e. bubble wrap, wadded waxed paper, jar lids). Some textures (i.e. cheesecloth, leaves, string) are placed on the painted surface. Cover those with a piece of thin paper, such as deli paper — and press into the paint, outlining the objects with your fingers. Remove the cover paper (which are often beautiful prints!) then remove the textured item from the plate.
    3. Place several 3x5 inch index cards — as masks — on the painted gel plate.
    4. Cover with the printing paper — rub with hands to transfer the paint — and pull your print.
    5. Place the 3x5 Gelli® plate onto an acrylic stamping block or other clear mount.
    6. Apply acrylic paint to the 3x5 Gelli® plate and roll into a thin layer with a brayer.
    7. Follow the same process as Step 2.
    8. Stamp the small plate directly onto a masked area of the printed paper.
    9. Repeat steps 6-8 to fill each masked area to complete the print.

    There are so many ways to approach this interesting printing process. Look around and you'll find all kinds of textures for printing! Use simple paper masks for building interesting layers! Imagine the possibilities!!


    THIS GIVEAWAY IS NOW CLOSED!!!! 

    Winner is Jane!

    And we have a fabulous GIVEAWAY so you can make colorful, textured, multi-plate prints like those created in the video!


    Our GIVEAWAY package includes:
    • 1 - 8x10 inch Gelli Arts® Gel Printing Plate
    • 1 - 3x5 inch Gelli Arts® Gel Printing Plate
    • 4 - Golden Open Acrylic paints — 4 oz. jars
    • 2 - Golden Open Acrylic mediums — (gloss and matte)
    • 1 - Yasumoto Kozo rice paper — 10"x 60' roll
    • 1 - Aitoh Hosho rice paper — 9x12 inch pad
    • 1 - Speedball 4" Soft Rubber Pop-in Brayer
    • 1 - Surprise Kit of Assorted Textures!

    To enter the giveaway, click on the red "ENTER GIVEAWAY HERE" button below! (This will ensure that we can contact the winner and that entries are limited to one per person.) One winner will be selected from all the entries via a random number generator to receive this very special giveaway!
    Terms & Condition for Giveaway 

    THIS GIVEAWAY IS NOW CLOSED!!!!


    Entries will be accepted until Tuesday, May 26th at noon EST. Our lucky winner will be contacted by email and announced here on the blog and on our Facebook page no later than Tuesday May 26th at 5pm EST. 

    Special thanks to Golden Artist Colors for their generous donation to our giveaway!
    Remember, we now have Gelli® partners all over the world, so it's easier than ever to find a Gelli® retailer near you!

    We all have our favorite textures, tools and methods for making our marks in monoprinting. Please leave a comment and share some of your favorites! Thanks!


    Good Luck and Happy Printing!


    Materials Used In Today's Blog:

    3x5" Gelli Arts®
    Printing Plate
    8x10" Gelli Arts®Printing Plate
    Golden Open Acrylics

    Golden Open Acrylic
    Medium - Gloss


    Golden Open Acrylic
    Medium - Matte
    Yasutomo Kozo
    Rice Paper
    Hosho Rice Paper
    by Aitoh
    Pointed Brush
    Acrylic Block

    DIY Gelli® Print Glass Paperweights!

    $
    0
    0
    The month of June ushers in more than just the promise of good weather. It's host to all sorts of gift-giving events! We have Father's Day, graduations, teacher appreciation gifts, weddings, bridal parties, and festive gatherings of all kinds.

    Thinking about gifts for these occasions? Here's a simple, quick DIY gift that's perfect for ALL of them beautiful glass paperweights!

    The best part? You can use your Gelli® papers (and scraps!) to create individual, personalized glass paperweight gifts — handcrafted for each special person or event!


    On the website www.photoweights.com, you'll find an inspiring selection of clear glass paperweight blanks that make ideal gifts — a great project for using your Gelli® printed papers. Based on my experiences with PhotoWeights® — the service is fast, friendly and helpful. The website also offers excellent ideas and instructions, so take a look.


    The paperweight blanks from PhotoWeights come as a kit, ready to assemble. Along with the clear glass paperweight, each kit comes with a self-adhesive mounting board and a self-adhesive bottom pad. A printed card with full instructions is also included. You supply the art, and you're good to go!


    To create your paperweight:
    1. Clean the glass paperweight. Be sure it's free of dust and fingerprints.
    2. Select your Gelli® print, or create a collage using Gelli® papers and scraps. Depending on the depth of the recessed area in your paperweight — you may also add dimensional objects.
    3. Remove the protective paper from the mounting board and place your print or collage face-up onto the self-adhesive side.
    4. Trim the print around the edge with scissors — to the size of the mounting board.
    5. Place the mounting board (image-side showing through the glass) into the recessed area on the bottom of the paperweight.
    6. Remove the protective paper from the bottom (velvet-like) pad and carefully center on the bottom of the paperweight. Gently press into place — then firmly press around the edges to create a good seal. That's it — you're done!

    TIP:  Different style paperweights have recessed areas of varying depths (which are listed in the specs for each style) — so keep that in mind as you make your selection. If you want to create a collage with dimensional embellishments, or display an object — make sure you select a paperweight blank that's deep enough to accommodate your piece. Happily, all of the styles can be used with Gelli® prints!


    Having a special party and planning to use place-cards? How about creating a paperweight for each table setting instead with the guest's name on it! Not only will it look fabulous on the table, but each one is a meaningful keepsake and a lasting memory of your event for your guests to take with them. Every Gelli® print is unique, and they'll add a truly creative touch to your table.


    Maybe you simply want to say 'thank you' for a favor. Or commemorate a birthday or anniversary. Or surprise someone with a random act of kindness. A personal paperweight memento made from your prints is such a nice and thoughtful way to do that. It's such a beautiful way to share your art!


    As great as these are as gifts, you hardly need an occasion to make a paperweight. You may want to have a few in your studio to help organize piles of collage papers. They're an inspiration to look at — they add an artful presence to any room.


    And you can never have too many! Put a few together and you have an instant 'collection'. So if you have a spot in your studio or your home you'd like to personalize, this offers another way to display your art as beautiful objects!


    For those of you with Etsy shops, or selling your printed works — paperweights showcasing your artwork offers another item you may want to sell!


    And think beyond paper — here's a great opportunity to use your Gelli® prints on fabric!


    Making paperweights is a project with a huge range of possibilities — from real simple to intricate — depending on how involved you want to get in each piece. If you've created ATC's, then you're already familiar with working in this approximate size range. Definitely fun!!


    You'll love the way your Gelli® prints look under glass — all glossy and vibrant! What a fabulous and lasting way to show off your prints! These are keepers!!


    Remember, we now have Gellipartners all over the world, so it's easier than ever to find a Gelli® retailer near you!


    Have Fun and Happy Printing!

    Materials Used in Today's Blog:

    Gelli Arts®
    Printing Plate


    Photoweight®
    Paperweight Kit 

    Gelli™ Printing: Patterns with Peel-Away Masks

    $
    0
    0
    Create amazing patterns in your Gelli prints by printing layers with re-positionable, reusable, peel-away chevron masks! Watch this video and see how easy it is to print an intentional and complex layered pattern using peel-away masks from Hazel and Ruby!


    What's special about this technique is the amount of control you have over your final print, and how easy it is to achieve it!


    Hazel and Ruby have a wonderful, on-trend selection of durable, re-usable, peel-away masks in a variety of images, graphic elements and bold alphabets in great font styles. Their self-adhering stencil mask material is also available in solid sheets so you can cut your own (by hand or a die-cutting machine).

    Instead of placing masks directly on the Gelli plate as we typically do, the H&R peel-off masks have a low-tack adhesive that allows you to apply them directly to your printing paper—exactly where you want!

    The H&R mask images and letters are fairly large—perfect for using with the BIG 12"x14" Gelli plate! The paper I'm printing on is 9"x12" Strathmore Bristol—to create bleed (borderless) prints.

    All you do is peel the mask off the clear plastic backing sheet, press it onto your paper where you want it placed—then roll out paint on your Gelli plate and print as usual! There's no need to be concerned about reversals.


    After you pull your print, peel off the masks. They're reusable, so it's recommended that you replace the masks on their original backing sheet and clean them off right away. It's easy to wipe the masks clean with a baby wipe while the paint is still wet. As seen in the video, sometimes they stick to the Gelli plate. Not a problem! They peel right off.


    The real fun starts when you print additional layers on previously masked prints! With these
    masks, you have total control over the placement of one element over another! Pull a print and when it's dry, place more masks where you want to preserve the previous print image. When that's dry, you can pull another layer on your print. It's so exciting to pull off the masks and reveal the layered image!


    The paints you use in layered prints have an important impact on the final print image. You can achieve beautiful colors by using thin applications of transparent paints on each layer. Golden Open Acrylic paints work especially well for this. My go-to palette for transparent pigments is Quinacridone Nickel Azo Gold, Quinacridone Magenta and Manganese Blue Hue. I love the clean colors they create when they're masked and layered!


    You can get a totally different effect using opaque paints vs. transparent paints. Here's an
    example using various Golden Heavy Body opaque paint colors.


    Using regular masks, it can be tricky to get precise placement when putting them on a painted plate. Being able to adhere your masks directly to the paper makes it simple! To get the effect in the print above, start with smaller circles. For each new layer, cover the previous printed circle image with a slightly larger circle mask.


    So there you have it! Another way to create fascinating prints! Creating complex patterns from simple chevron masks can be just the beginning! These prints are a natural springboard for collage or doodling! This technique is great for everything from canvas wall art to journal pages, cards and more!


    THIS GIVEAWAY IS NOW CLOSED!!!!

    Winner is Judy H!
     
    And here we go with another AWESOME giveaway!

    This prize will have you making large layered, masked prints!


    The prize kit includes:
    1 - 12" x 14" Gelli Arts Gel Printing Plate
    5 - Hazel and Ruby packages of Peel-Off Stencil Masks
    3 - 4 oz. jars of Golden Open Acrylic paint
    1 -9" x 12" Strathmore Bristol pad - 20 sheets
    1 - Speedball 4" Soft Rubber Pop-In Brayer

    All those goodies—and one more FUN thing...
    By request, we've taken our 'Addicted to Gelli' badge beyond the virtual realm and made it a reality! So we're adding our brand new pin-backed metal badge to this giveaway!


    To enter the giveaway, click on the red "ENTER GIVEAWAY HERE" button below! (This will ensure that we can contact the winner and that entries are limited to one per person. One winner will be selected from all the entries via a random number generator to receive this very special giveaway!) Entries will be accepted until Monday, January 26th, 2015 at 12 noon EST. Our lucky winner will be contacted by email and announced here on the blog and on our Facebook page no later than January 26th at 5 pm EST! 

    THIS GIVEAWAY IS NOW CLOSED!!!!

    Special thanks to our friends at Hazel & Ruby for their generous donation for our prize.


    P.S. If you'd like to add our badge to your blog—you can grab the html code from the widget at the top of our blog!
    Good Luck and Happy Printing! 

    Gelli® Printing with DIY Cardboard Texture Plates - and Giveaway!

    $
    0
    0
    Get a head start making your own custom-designed texture plates for Round Gelli® plates by beginning with pre-cut cardboard cake circles! Watch this video and see how easy it is to create texture plates for monoprinting using these corrugated cardboard circles.


    The baking aisles in craft stores are stocked with a number of products that have potential use in printmaking — and it's a fun place to get ideas. What captured my attention were the cardboard cake circles! The sizes are just right for making texture plates for the round Gelli®  Plates!


    Corrugated cardboard is like a springboard for the imagination! There are countless ways to create textures on a cardboard substrate for printing. Plus, corrugated cardboard's unique layered and laminated structure means you can carve interesting designs in it, then pull back the top layer to reveal striped areas! Let's explore that process!


    All you need for carving cardboard texture plates is a craft knife with a sharp blade, a cutting mat, and a pointed tool.


    The cardboard cake circles I bought are regular corrugated cardboard with brown kraft paper on one side — and shiny white paper on the other. After experimenting with cutting and printing both sides, I found the regular brown cardboard side printed the best and resulted in the crispest images. So that's what I recommend.


    You can work freehand, or draw your design on the cardboard first and cut along the drawn lines. Don't cut all the way through the bottom layer — just the top. I tend to cut through the corrugated layer too — it's hard to avoid — and that's okay. It also helps to mark the sections you want to remove.


    Cut your design through the top layer of the cardboard with a craft knife. Then remove sections of the top layer of paper — revealing the stripes below.


    To remove a cut section of the top layer of the cardboard — carefully pull it up. It helps to slip a pointed tool, like a knitting needle or an awl, into a 'valley' under the area you wish to remove. That helps lift the paper — revealing the striped corrugated paper underneath.

    TIP:  The top paper does not usually come off cleanly. So, while pulling the paper up, I run an awl or knitting needle along the edge of the 'mountains' to help release the paper. A tweezer comes in very handy to pull up any small or stubborn remaining pieces.


    As you're tearing and removing the top paper, you may want to leave some of the peeled paper remnants that stick to the corrugated 'mountain' part of the cardboard. The torn paper remnants can create a more organic look in your prints.


    You can also trace a stencil onto the cardboard and use that as your guide for carving the cardboard! Cut along the lines and remove the top layer of paper — leaving the areas that are the 'holes' in the stencil — to create your pattern.


    Add layers! Cardstock, chipboard, or manila folders are all great paper materials to use for adding shapes to your cardboard substrate. You want to be sure to glue any papers securely to the cardboard so they don't come off while printing. Tacky glue works well.


    You can create interesting printed images by gluing torn paper, hand-cut shapes, die-cuts and punched pieces to your cardboard plate.


    Punching holes into the cardboard plate with an awl will create dots in your printed image.


    Printing with cardboard plates:
    1. Apply acrylic paint to your Gelli® plate and roll into thin layer with a brayer.
    2. Press your cardboard plate firmly into the wet paint — and remove.
    3. Place your printing paper on the Gelli® plate, rub to transfer the paint — and pull your print!


    The paints used for all of these prints are Amsterdam Standard Series acrylics. They have a fabulous line of colors — one of my favorites is Pewter. It's a beautiful metallic — and great when layering with other colors! 


    If you're into neon brights — check out their Reflex colors! The final pull on this print is toned with a solid sheer layer of Reflex Rose. Seriously vibrant!


    When working in layers with the same texture plate, as you press the cardboard plate into wet paint on the Gelli® plate, each layer is usually a bit out of registration. That can create a 'drop shadow' effect, which gives the print a dimensional look. Very cool!


    It's so satisfying to make your own unique cardboard texture plates! And cardboard is everywhere! Keep your eye out for round cardboard packaging! It's a great find when you come across it :)


    Cardboard texture plates are sturdy and can be used over and over! And the prints are so wonderful!! Try it!


    Eventually, the cardboard texture plates can become so layered with paint they develop a beautiful patina — and you may want to use them as collage material. They can even be a finished piece of art — as is!


    Our FABULOUS giveaway is a complete kit for making exciting ROUND prints with DIY cardboard texture plates!


    The Prize Kit includes:
    • 1 - 8" Round Gelli Arts® Gel Printing Plate
    • 1 - 6" Round Gelli Arts® Gel Printing Plate
    • 1 - 4" Round Gelli Arts® Gel Printing Plate
    • 10 - Amsterdam Standard Series Acrylic Paint - 120 ml Tubes
    • 1 - Speedball® 4" Soft Rubber Pop-in Brayer
    • 1 - 6 in. Wilton® Cake Circles - pkg. 10 count
    • 1 - 8 in. Wilton® Cake Circles - pkg. 12 count
    • 1 - 10 in. Wilton® Cake Circles - pkg. 12 count
    • 1 - X-Acto Gripster Knife
    • 1 - Gelli Plate Printing: Mixed Media Monoprinting Without a Press - 144 page book signed by author, Joan Bess

    To enter the giveaway, click on the red "ENTER GIVEAWAY HERE" button below! (This will ensure that we can contact the winner and that entries are limited to one per person. One winner will be selected from all the entries via a random number generator to receive this very special giveaway!) Entries will be accepted until noon EST Monday, June 22nd, 2015. Our lucky winner will be contacted by email and announced here on the blog and on our Facebook page no later than 5pm EST on June 22nd, 2015! 
    Remember, we now have Gelli® partners all over the world, so it's easier than ever to find a Gelli® retailer near you!

    http://www.gelliarts.com/pages/find-a-retailer

    Good Luck and Happy Printing! 

    Materials Used In Today's Blog:


    4" Round
    Gelli® Plate
    6" Round
    Gelli® Plate
    8" Round
    Gelli® Plate
    Wilton® 6"
    Cake Circles
    Wilton® 8"
    Cake Circles
    Wilton 10"
    Cake Circles
    X-Acto Gripster
    Knife
    Creative Mark
    Cutting Mat
    Clover Bamboo
    Knitting Needles
    110 lbs Cardstock
    Chipboard
    Manila Folders
    Tacky Glue
    Clover Straight
    Tailor's Awl
    Amsterdam® Standard
    Series Acrylic

    DIY Home Decorating with Gelli® Prints

    $
    0
    0
    Can you answer YES to the following questions? If you do — I have a FUN project for you!!
    1. Do you have a large and growing stash of Gelli® prints?
    2. Do you like DIY home decorating projects?
    3. Do you want to create an artful environment?
    4. Do you have stairs (or a 'bare' area) in your living space?
    Yes? Great!! I answered "yes" to these questions, too!


    The 'bare' spot in my home is a back staircase. It's straight up, slightly narrow — and screaming for some ART!


    At first, I didn't have a clear idea for how I wanted to decorate the space. Hang prints on the empty walls? Then — my vision snapped into focus! A collage of Gelli® prints covering each of the risers!!! Here's the transformation!


    Once the idea takes form, and the spark of enthusiasm gets you fired up — it's all about figuring out the logistics. There are endless ways to approach this project. I'll explain how I went about making my stair collages. You may come up with a different plan — and that's great! There's no right or wrong way — just what works best for you!


    Fun, isn't it?!!

    The first decision is what to use as the substrate for the collages. To be honest, I was looking for a process that would allow for a removable installation — just in case! I considered a variety of materials including primed canvas, stiff non-woven interfacing, wallpaper, heavyweight kraft paper and a few others. Each seemed like it would work. I decided to use primed canvas for its sturdiness and flexibility. Turns out, it's perfect for the job!


    The risers on my staircase measure 34.75 inches wide — by 6.25 inches high (accounting for a small strip of moulding across each). It helps to make a paper template, and it's a good idea to check it against each riser. If your risers aren't even, you can make a template for each one, if needed. Then cut your substrate to size — one piece for each riser.


    All of the prints selected for this project are from my stash — and printed on either card stock or bristol. The plan is to cut the prints into strips, making them easy to arrange and line up next to each other.


    I cut up a TON of prints — way more than I needed!


    Cutting the prints into strips goes pretty fast using this Fiskars® 12" paper trimmer. The little blade zips right through the prints. But cutting all that heavyweight painted paper dulls the blade after a while. So if you're slicing up piles of prints, it's good to have an extra blade on hand. The replacement blade drops right into place — easy to swap out.


    The next step is deciding on an appropriate adhesive for gluing the prints to the canvas. Again, there are so many different adhesives to choose from. I considered gel medium, matte medium, PVA, decoupage glue and tacky glue — and each would work for this project. But I went in a different direction and used Aleene's® Tack-It Over& Over — applied to the primed side of the canvas.


    Here's why:  It's a pressure-sensitive liquid adhesive that's very sticky when dry — which means it turns the canvas substrate into a self-adhesive surface. So you simply lay the printed strips in place on the sticky surface and press — then burnish the whole collage with a bone folder. No buckling wet papers! No drying time! Easy peasy :) The adhesive is designed to create a temporary bond for attaching embellishments to fabric (making them removable) — but I find its bond between paper and canvas is strong.


    NOTE:  I discovered when a using a thin coat of Aleene's® Tack-It Over & Over, the papers can be carefully removed after they're in place. When I used a heavy coat of the adhesive, the paper grabbed onto the sticky adhesive and didn't let go — and tore when I tried to remove it. It's worthwhile to do some testing first — especially if you've never worked with this pressure sensitive adhesive before.


    Aleene's® Tack-it Over & Over is a very sticky adhesive to work with while wet. I wear disposable gloves to keep it off my hands — and definitely recommend it. I use a 3 inch wide Colour Shaper to squeegee the glue onto the substrate. An old credit card, hotel key card, or piece of mat board would work too. I find scraping the adhesive onto the canvas (instead of brushing it on) is a fast and easy way to apply an even coat with good coverage. Also, be sure to work on a disposable table covering. I place a large piece of heavy kraft paper under each canvas substrate. Remember, this stuff is super-sticky when dry, so you don't want it on your work surface!


    After the collages are constructed — while they're still on the kraft paper — apply a coat of DecoArts® Americana Decou-page Matte for a protective finish and let them dry. These are now nice sturdy, sealed pieces — ready to install!


    Here's the step-by-step directions for how I created the collages:
    1. Cut prints into strips.
    2. Create a template for the risers.
    3. Cut a piece of primed canvas for each riser.
    4. Apply a layer of Aleene's® Tack-it Over & Over to the primed side of each substrate with a scraper tool.
    5. Allow the glue to dry completely. It goes on white — dries clear — and is very sticky when dry.
    6. Place cut print pieces on the substrate and press in place. Burnish with a bone folder to create a strong bond. 
    7. Squeegee on a thin coat of DecoArt Americana Decou-Page Matte to seal the collages. Let dry.
    8. Remove collage from disposable kraft paper. Trim the pieces that extend beyond your substrate. 


    The last step is installing the collages on the stair risers. My risers are painted, and I used Glue Dots® Removable Dots. I applied the dots liberally to the back of each canvas — then firmly pressed each canvas in place against the riser. The collages are holding up nicely in their vertical space! When I tested the removal — the glue dots stuck to the paint, not the canvas — but peeled easily off the paint without any problems. There are various adhesives designed for hanging posters on painted walls (that are supposed to offer easy removal) that may be another way to go. You can explore different options — but test them in an inconspicuous area first.


    What a difference! The whole staircase comes to life with colorful FUN! What a great way to display Gelli® prints!!


    And one of the best parts is that I've used so much of my Gelli® print stash — it's time to start printing again!!! More fun!!!

    If you don't have a staircase, look around for an area that could use a big blast of color. Henry, at Gelli Arts®, creatively mounted some of his prints over the doorways in the Gelli Arts® office!!! Fabulous!!!


    You can always interpret the basic idea here to a large stretched canvas or panel — and hang it where it'll make you happy :) So go ahead and "Gelli® up" your home!

    Remember, we now have Gelli® partners all over the world, so it's easier than ever to find a Gelli® retailer near you!

    http://www.gelliarts.com/pages/find-a-retailer

    One last thing... if you haven't joined us on Instagram - please do! And if you're sharing your Gelli® artwork on Instagram - please be sure to tag us — @gelliarts! Don't forget to use the hashtags #gelliplate, #gelliprint or #gelli (or all three!!)  — so that way we can find you too!

    Instagram


    Have Fun and Happy Printing!

    Materials Used In Today's Blog:
    Gelli Arts®
    Printing Plate
    Heavyweight
    Kraft Paper
    Fredrix
    Canvas Roll
    Fiskars 12"
    Portable Trimmer
    Aleene's Tack-it
    Over & Over
    Ergo Teflon
    Floder/Folding Rib
    Disposable Gloves

    Silicone Wide Firm
    Flat Brush: Size 3
    DecoArt Americana
    Decou-Page Matte
    Glue Dots
    Removable Dots

    DIY Gelli® Printed Fabric Patches!

    $
    0
    0
    Before we jump into Joan's amazing project (and it IS amazing!) - we want to share TWO exciting pieces of information!
    1. Gelli Arts® is on Instagramcome join the fun! 
    2. And, we now have over 1 MILLION views! Help us - enter to win at the end of this blog post!
    Now... onward to Joan's super hip project: 

    Gelli® Printed Personalized Fabric Patches!

    Seems like everywhere you look, someone is wearing a pair of shredded jeans with blown out knees or personalized jeans with laced edges, patched holes or artful stitching. Lots of interesting and creative mending going on as well with fabulous handmade patches! Getting ideas?!!

    You can call the trend Boho Chic, Urban Chic, Vintage or Hipster... it falls into all categories! Here are some great examples from Pinterest which is loaded with ideas and inspiration for personalizing your vintage jeans and clothing. 


    Here's my version inspired by this fun trend!


    Using a small Gelli® plate with fabric paint — to stamp on fabric — is about the fastest, easiest way to create a variety of unique printed fabrics! For patches, all you need are small fabric fragments. It's the perfect opportunity for printing up some fabric scraps and pieces cut from old garments.


    And don't overlook commercially-printed fabrics! I found some fun designs at fabric.comthat I couldn't wait to monoprint all over! The preprinted backgrounds add another layer of interest to monoprinted images.


    When printing on fabric, I almost always iron it onto freezer paper to stabilize it. It helps to iron the fabric before printing on it — to get rid of any wrinkles. I figure if I'm going to iron the fabric, I might as well iron it onto freezer paper while I'm at it! But it's absolutely okay to skip this step if you want to.


    Stamp as many images as it takes to cover a piece of fabric — with each imprint different from the next. Change up the colors. Use stencils, masks, combs...and all of your favorite texture tools. FUN!


    I came across Fabric CreationsBlock Printing Stamps by Plaid Industries — and had to try a few! As expected, they're great for Gelli® printing! Just press the stamp into wet paint on your Gelli® plate (like you would with any stamp) to remove paint — and print a negative image. You can also stamp them directly onto fabric, which is what they're designed for.


    Using the 'wrong' side of commercially-printed fabric — where the pattern is muted — gives your print a more subtle, washed-out looking background.


    You'll quickly find outit's as addicting to print on fabric as it is on paper! Try ityou'll see!


    For stamping, a clear acrylic block or acrylic sheet is a perfect mount. Just press your Gelli® plate onto the acrylic piece and it'll stick until you take it off. And since it's clear, you can see exactly where you're stamping! All of these images printed on fabric were stamped with a 3"x5" Gelli® plate mounted on a 4"x6" clear acrylic stamp block.


    If you're making patches for clothing, it's important to use paint that holds up to laundering. My go-to fabric paint is DecoArt® SoSoft. It's available in a nice range of colors, and you can mix them to create your own custom colors. And another good thing — SoSoft doesn't need to be heat-set! The instructions say to wait 48-72 hours before washing, and that's it!


    And, as its name indicates — the hand of the fabric stays soft. Some paints can have a plastic-y feel. Definitely not what I want on my old, worn jeans.


    For printing, apply some paint to the gel plate and roll it into a smooth layer with a brayer. Create your design in the wet paint, then stamp it onto your fabric. So easy!


    If you want to embellish your printed fabric — there are lots of fabric markers made for that purpose. The Pentel® Gel Roller for Fabric is a 1.0 mm pen that's great for doodling and drawing lines — my favorite!


    After printing the fabric and letting it sit/cure for a few days, I tore and cut it into pieces — ready to fashion into patches.


    This is where you follow your muse and create patches that suit your taste. I wanted to preserve the worn look and feel of my old jeans. Layering hand-sewn patches — with frayed and unfinished cut edges — seemed like a good way to do that. And it presented a perfect opportunity to try my hand at a little embroidery!


    Almost all of the stitching on these patches and jeans was done with DMC® Six Strand Embroidery Floss, but there's also some DMC® Pearl Cotton Size 5.


    If you're not familiar with Japanese boro (translates as rags, or scraps of cloth), much inspiration can be found in these amazing garments and textiles that have been patched and repaired many times. The extensive mending and patching, sometimes over generations, imbues each unique piece with an extraordinary inherent beauty that speaks of its history. There's a visual feast of stunning examples on the internet, so I hope you'll take a look! (do a Google search for 'Japanese boro' and look under 'images')


    Sewing the patches onto my jeans proved to be a meditative process with happy results. Not to mention a bit nostalgic — a throwback to my college days in the early '70's when we all wore threadbare and patched jeans!


    Maybe I got a little carried away patching these jeans? And still, it's easy to visualize this as a work in progress! I intend to keep adding more layers of printed fabric patches and more stitching to this pair of jeans. Some projects feel so good to work on you don't want to stop — and this is one of them. Being able to add bit by bit with no specific end-result in mind makes this a great on-going project to work on when the mood is right.


    If you have a worn garment that could use some repair — or are just looking to personalize or embellish a pair of jeans for the fun of it — try Gelli® printing on fabric and making a few patches!


    It's time to CELEBRATE over 1 Million views on this blog!! 

    We are giving away one 3"x5" Gelli® Printing plate and one 4" Round Gelli® printing plate to one lucky person so that they can make their own personalized Gelli® printed patches! Enter below!!

    a Rafflecopter giveaway

    Remember, we now have Gelli® partners all over the world, so it's easier than ever to find a Gelli® retailer near you! 

    http://www.gelliarts.com/pages/find-a-retailer

    Have Fun and Happy Printing!

    Materials Used In Today's Blog:

    3x5" Gelli® Plate
    Fabric
    Reynold's Freezer
    Paper
    Fabric Creations™
    Block Printing Stamps
    4x6" Acrylic
    Block
    DecoArt® SoSoft
    Fabric Paint
    4" Speedball®
    Rubber Brayer
    Pentel® Gel
    Roller for Fabric
    DMC® Six Strand
    Embroidery Floss
    DMC® Pearl
    Cotton Size 5

    Printing with Small Gelli™ Plates!

    $
    0
    0
    Love creating tags, cards and ATC's? Now there are two smaller Gelli plate sizes — perfect for these small print formats – and great for so many other projects and artwork. Watch this video and see how much FUN these new sizes are to print with! 


    The NEW Gelli plate sizes are 3"x5" and 5"x7" ... just right for creating tags, cards, ATC's, 
    postcards, small fine art prints or adding monoprinted images directly to larger work. The 
    possibilities are endless!


    It's so much fun creating small printed images. Printing on tags is so fast and addicting! It takes no time at all to create interesting layers. Use your favorite texture tools, stencils, and masks — and the acrylic paint of your choice.


    The hard part is stopping!


    FYI — the following materials were used to make the prints shown in the video:
    3"x5" Gelli Arts® Gel Printing Plate
    5"x7" Gelli Arts® Gel Printing Plate
    Speedball 4" Soft Rubber Pop-in Brayer

    Paints: 
    Paper:
    Texture Tools:
    • Leaf 
    • Grafix Edge Stencil Film (various 'O' shapes cut on Silhouette Cameo)
    • Grafix Stencil Film - Heavyweight (punched circle masks)
    • Dura-Lar (masks: hand-cut with fancy-edge scissors)
    • Assorted commercial stencils
    • Embossed paper (from Spellbinders embossing folder)
    • Novelty yarn
    • Rubbing plate (Roylco)
    Small prints invite free and spontaneous printing. As you can see from the list above, anything goes. Use your favorite materials and techniques! Cut your own simple masks! The small format invites experiments of all sorts. And printing on index cards is a wonderful way to try out new ideas!


    This Contest is officially CLOSED

    ****Congratulations! Our winner for this giveaway via a random number generator drawing was Lilotte! You can see more of Lilotte's artwork here... http://lilotte.canalblog.com/ 

    And now... Our exciting giveaway includes both of our new small Gelli plate sizes:


    1 — 3"x5" Gelli Arts® Gel Printing Plate
    1 — 5"x7" Gelli Arts® Gel Printing Plate

    One winner will be selected at random to receive our two new small plates. To enter to win 
    simply leave a comment here on the blog. Comments will be accepted until Monday, June 23rd, 12noon EST. Our lucky winner will be announced here on the blog and on our Facebook page no later than Monday, June 23rd, 5 p.m. EST.

    This Contest is officially CLOSED

    Good Luck and Happy Printing!


    Viewing all 344 articles
    Browse latest View live